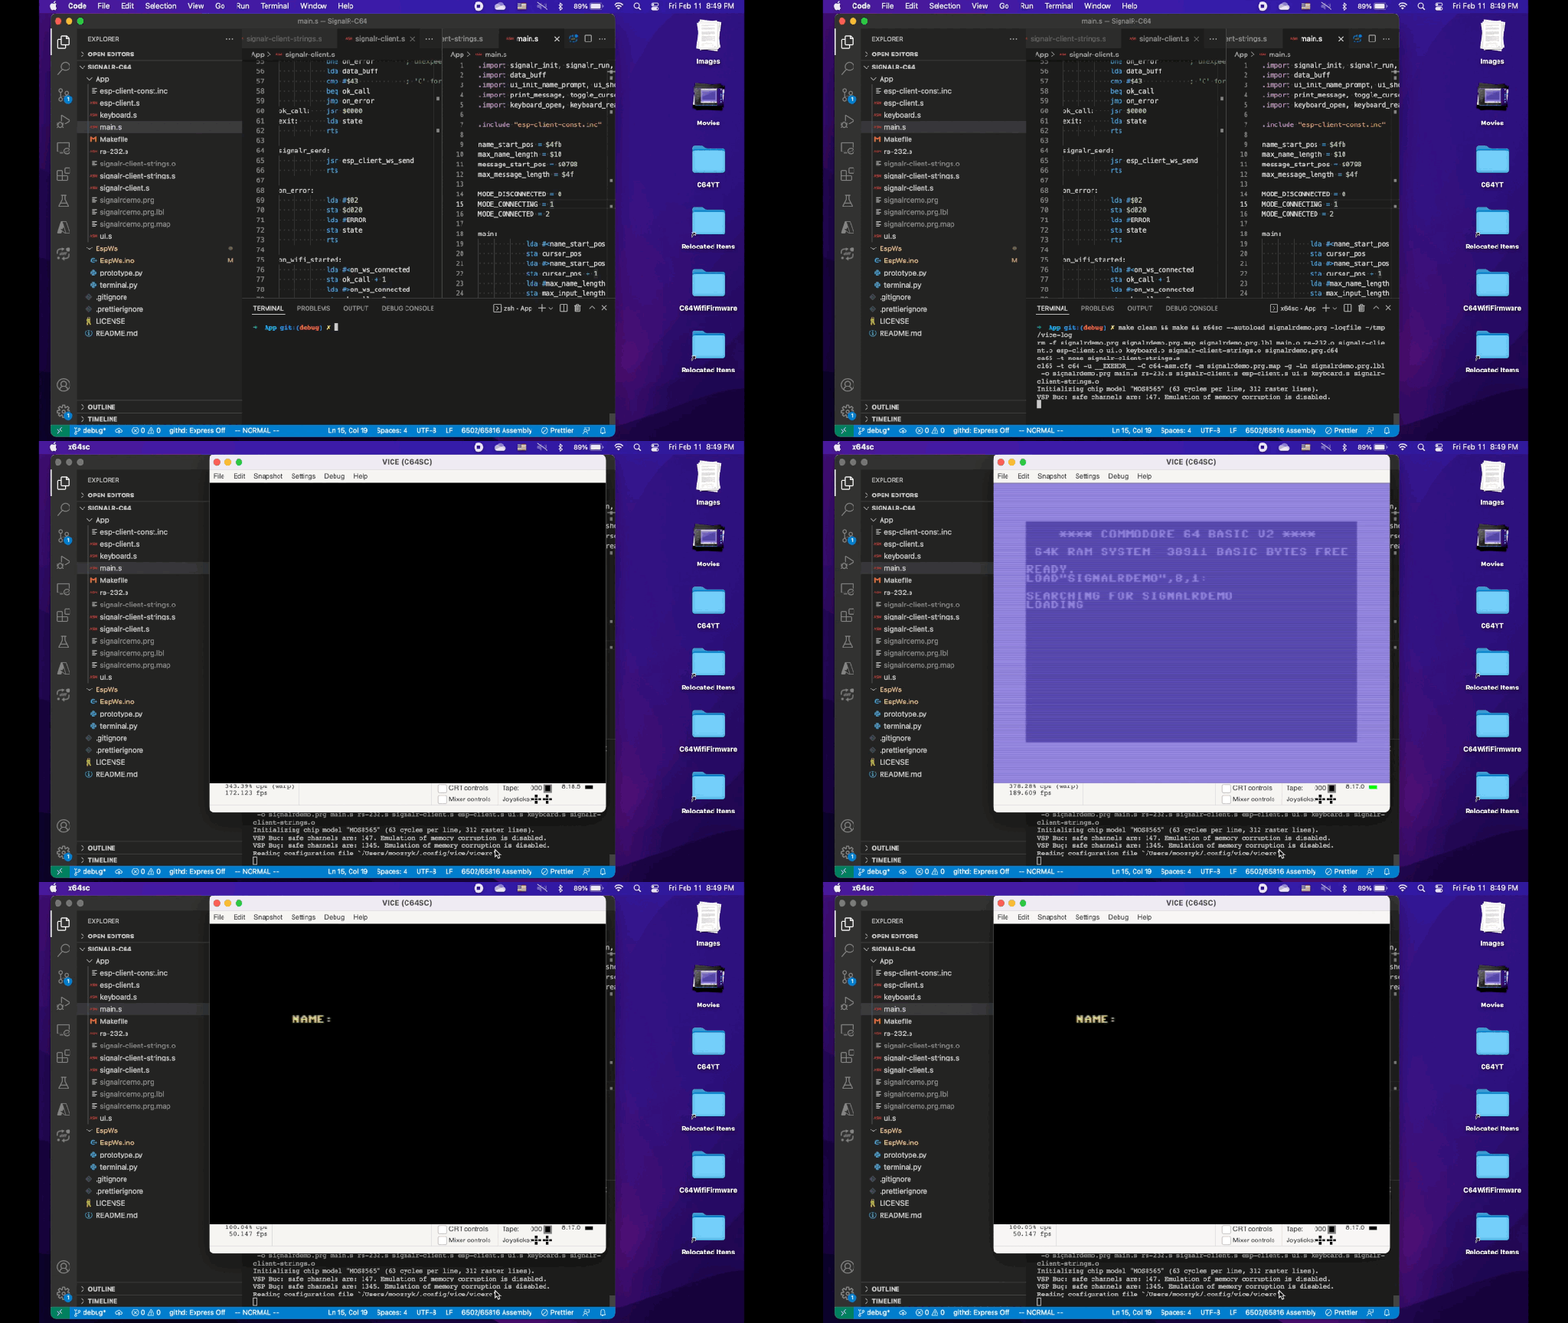
After devising a high-level design for my idea, I needed to take care of more mundane things, starting with setting up the development environment. First, I had to find out if using a Commodore 64 emulator for testing and development was an option. I wanted to rely on the emulator as much as possible to speed up the development time. The main two concerns I had were:
- would the emulator even support external devices?
- if, the above was true and my idea worked on the emulator, would it work on real hardware
Vice-64 was the most advanced and mature Commodore 64 emulator I knew of. I used it previously in some of my projects (e.g. Vintage Studio) and to occasionally play some of my favorite games but never with any external hardware. Looking at Settings gave me hope – I found that there were at least controls allowing to configure serial communication. After playing with the settings for a bit I was able to make Nova Term connect to a BBS via the C64-WIFI modem connected to my laptop via USB. This answered my first concern and assured that I would be able to code and test the entire solution on my laptop with maybe some additional debugging on the real C-64 at the very end. Another benefit of using Vice was access to the built-in debugging tools. They allow setting breakpoints and stepping through the code and the support for labels makes debugging much easier.
Next, I had to decide on which 6502 assembler to use. I found ca65 (a part of cc65 suite https://github.com/cc65) to be the best option. It has a lot of great features, has been around for a long time and has a lot of documentation as well as source code available on github. I was almost sure that VS Code was the safest bet to serve as my 6502 assembly editor as it has a ton of extensions. The main thing I was looking for was syntax highlighting and I quickly found the CA65 extension which did exactly what I was after. The extension also provides build tasks but I have not used them as I decided to go with make. Overall, the combination of Vice, VS Code, ca65 and make ended up making quite a productive environment where I could quickly build, launch and debug my project.

To handle the NodeMCU part I decided to stick to Arduino Studio. I knew that VSCode had an Arduino extension (heck, I even created one long time ago before Microsoft decided to occupy this space) but it tried to reformat my code the way I did not like and I didn’t want to spend the time on adjusting it to my liking. I also think I had some issues with uploading my sketch to the board while everything worked fine from Arduino Studio.
At the beginning I was able to test my NodeMCU code using screen. It was possible because the protocol I implemented was text based. Later, I switched to a fully binary protocol and using any general purpose solution was not an option, so I created a simple terminal in Python that was able to interpret and translate my commands and the responses from the module.
I used a standalone NodeMCU module for most development but occasionally tested my code against the C-64 WiFi’s NodeMCU module. Surprisingly, I found some slight differences between how the boards behaved immediately after booting and had to implement a simple workaround which ignored first few bytes received from the module.
For the SignalR part I just took the chat server I created for my other project. I ran it locally during the implementation and then deployed to Microsoft Azure for final testing and demo.
The final missing piece of my environment was actual hardware. I had a Commodore 64 that I know was working the last time I turned it on because it was when I fixed it. I also had a 1084S-D2 monitor which stopped working when I was testing my C-64. Fortunately, it turned out to be only the power switch. Replacing the switch brought the monitor back to life. I decided to go fully retro and had to acquire a 1541 disk drive – luckily I found a working one in decent condition on craigslist. I received a bunch of disks used with Commodore 64 from a colleague many years ago. Despite all these years in a closet almost all of them worked just fine. The only thing remaining was to transfer the compiled program to a disk which I did using a SD2IEC module.
Looking back I am really amazed how many technologies – both hardware and software – were involved in putting my solution together. Four programming languages, vintage and modern hardware, embedded programing, Cloud technologies and a variety of, mostly open source, tools. All this made this project a lot of fun. Next time we will take a closer look at the implementation.
2 thoughts on “Cloud enabled Commodore 64: Part II – Development Environment”