How I shipped an app that actually sells

My github is a graveyard of unfinished projects. So, when a new idea hit me, I didn’t even bother opening my laptop. Why would this time be different? Two months later, I finally picked it up (mostly to shut my brain up) and built Visual Minipro.

What is it?

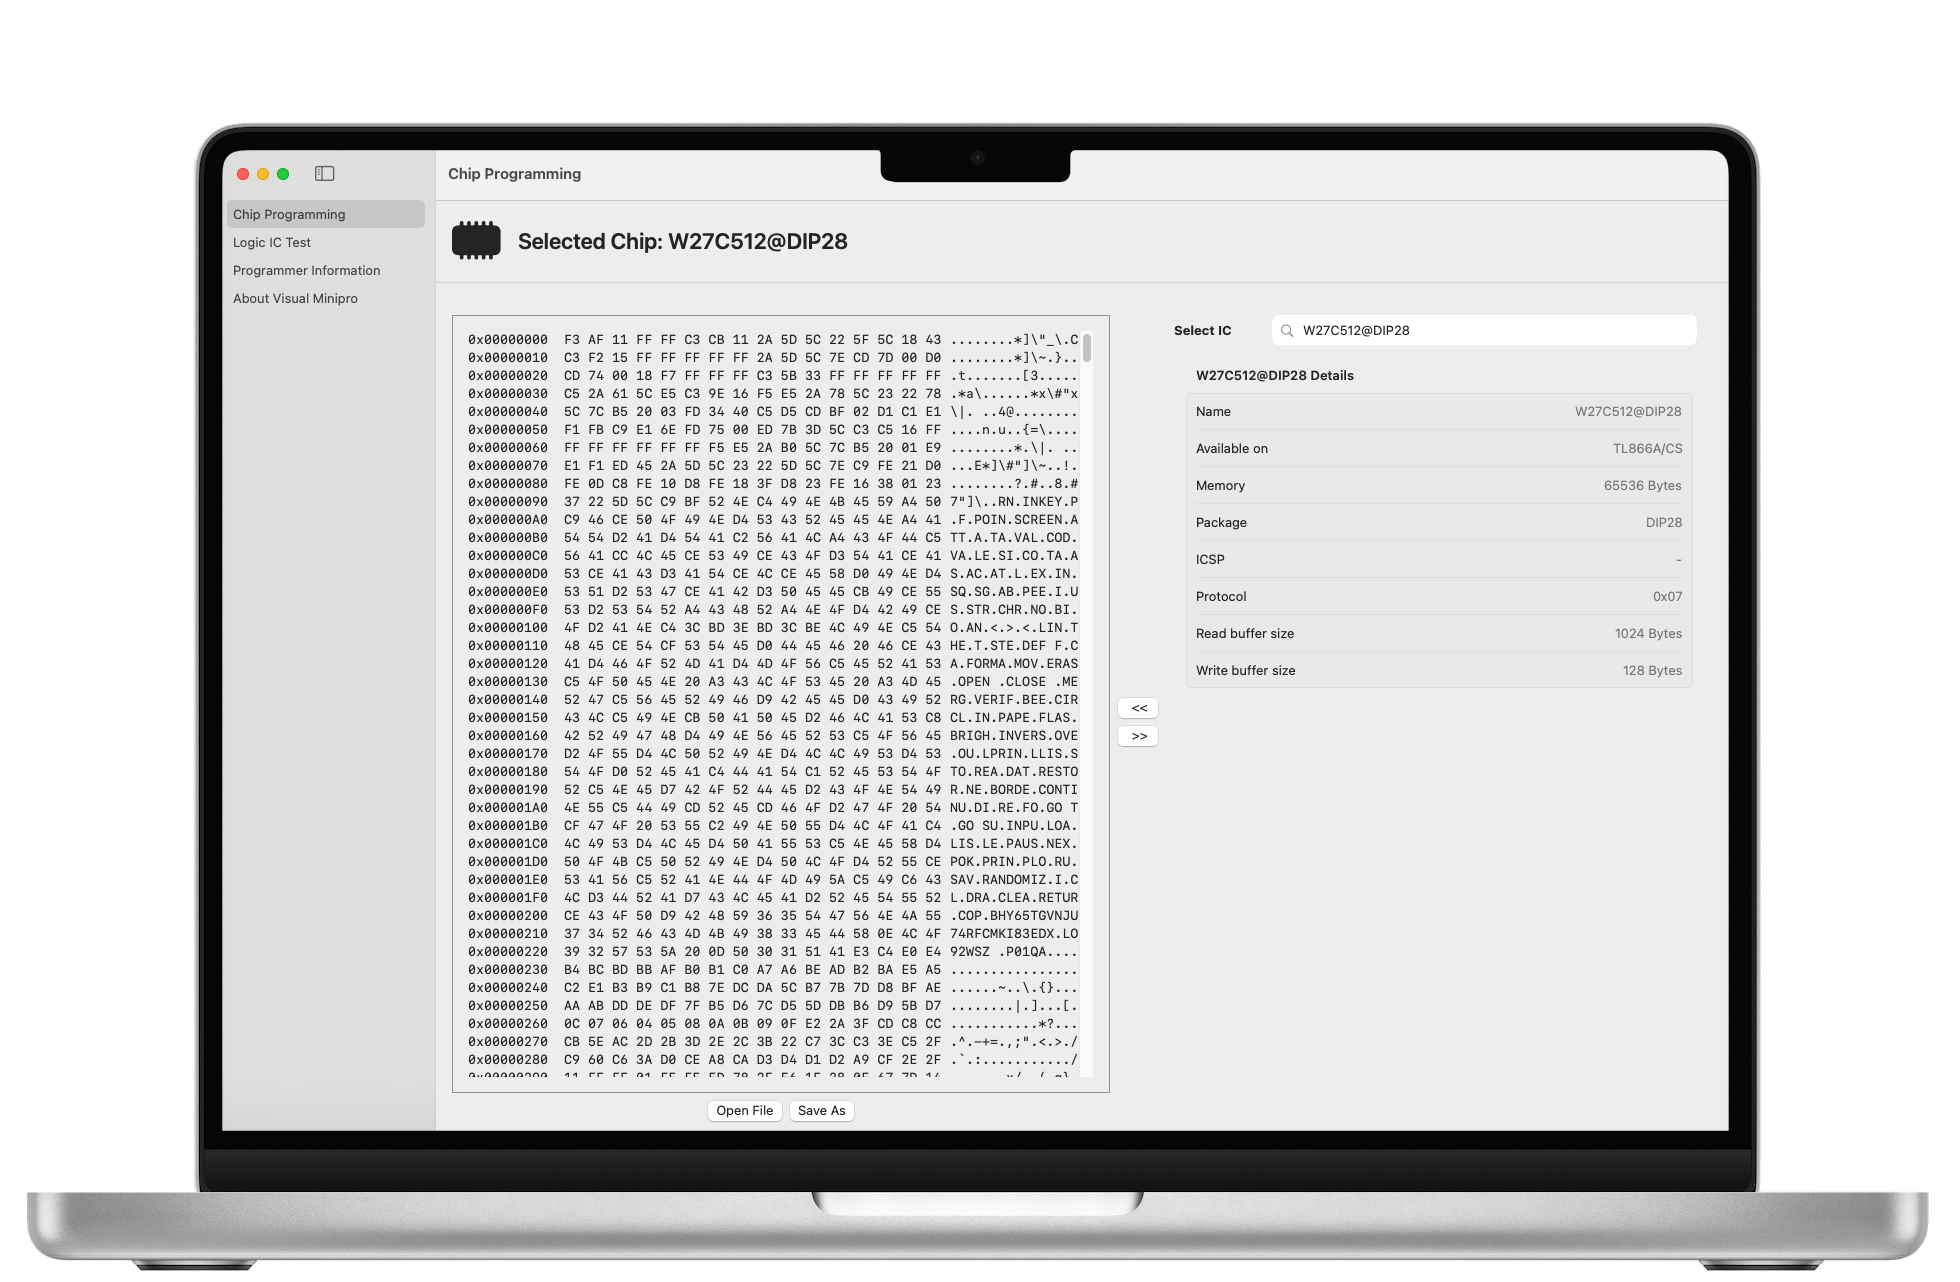
Visual Minipro is the missing MacOs app for XGecu EEPROM programmers. I built it for retro-computing enthusiasts (like myself), automotive technicians, and electronic hobbyists who want to be able to use their XGecu programmers on Mac in an easy and intuitive way.

Why I built it

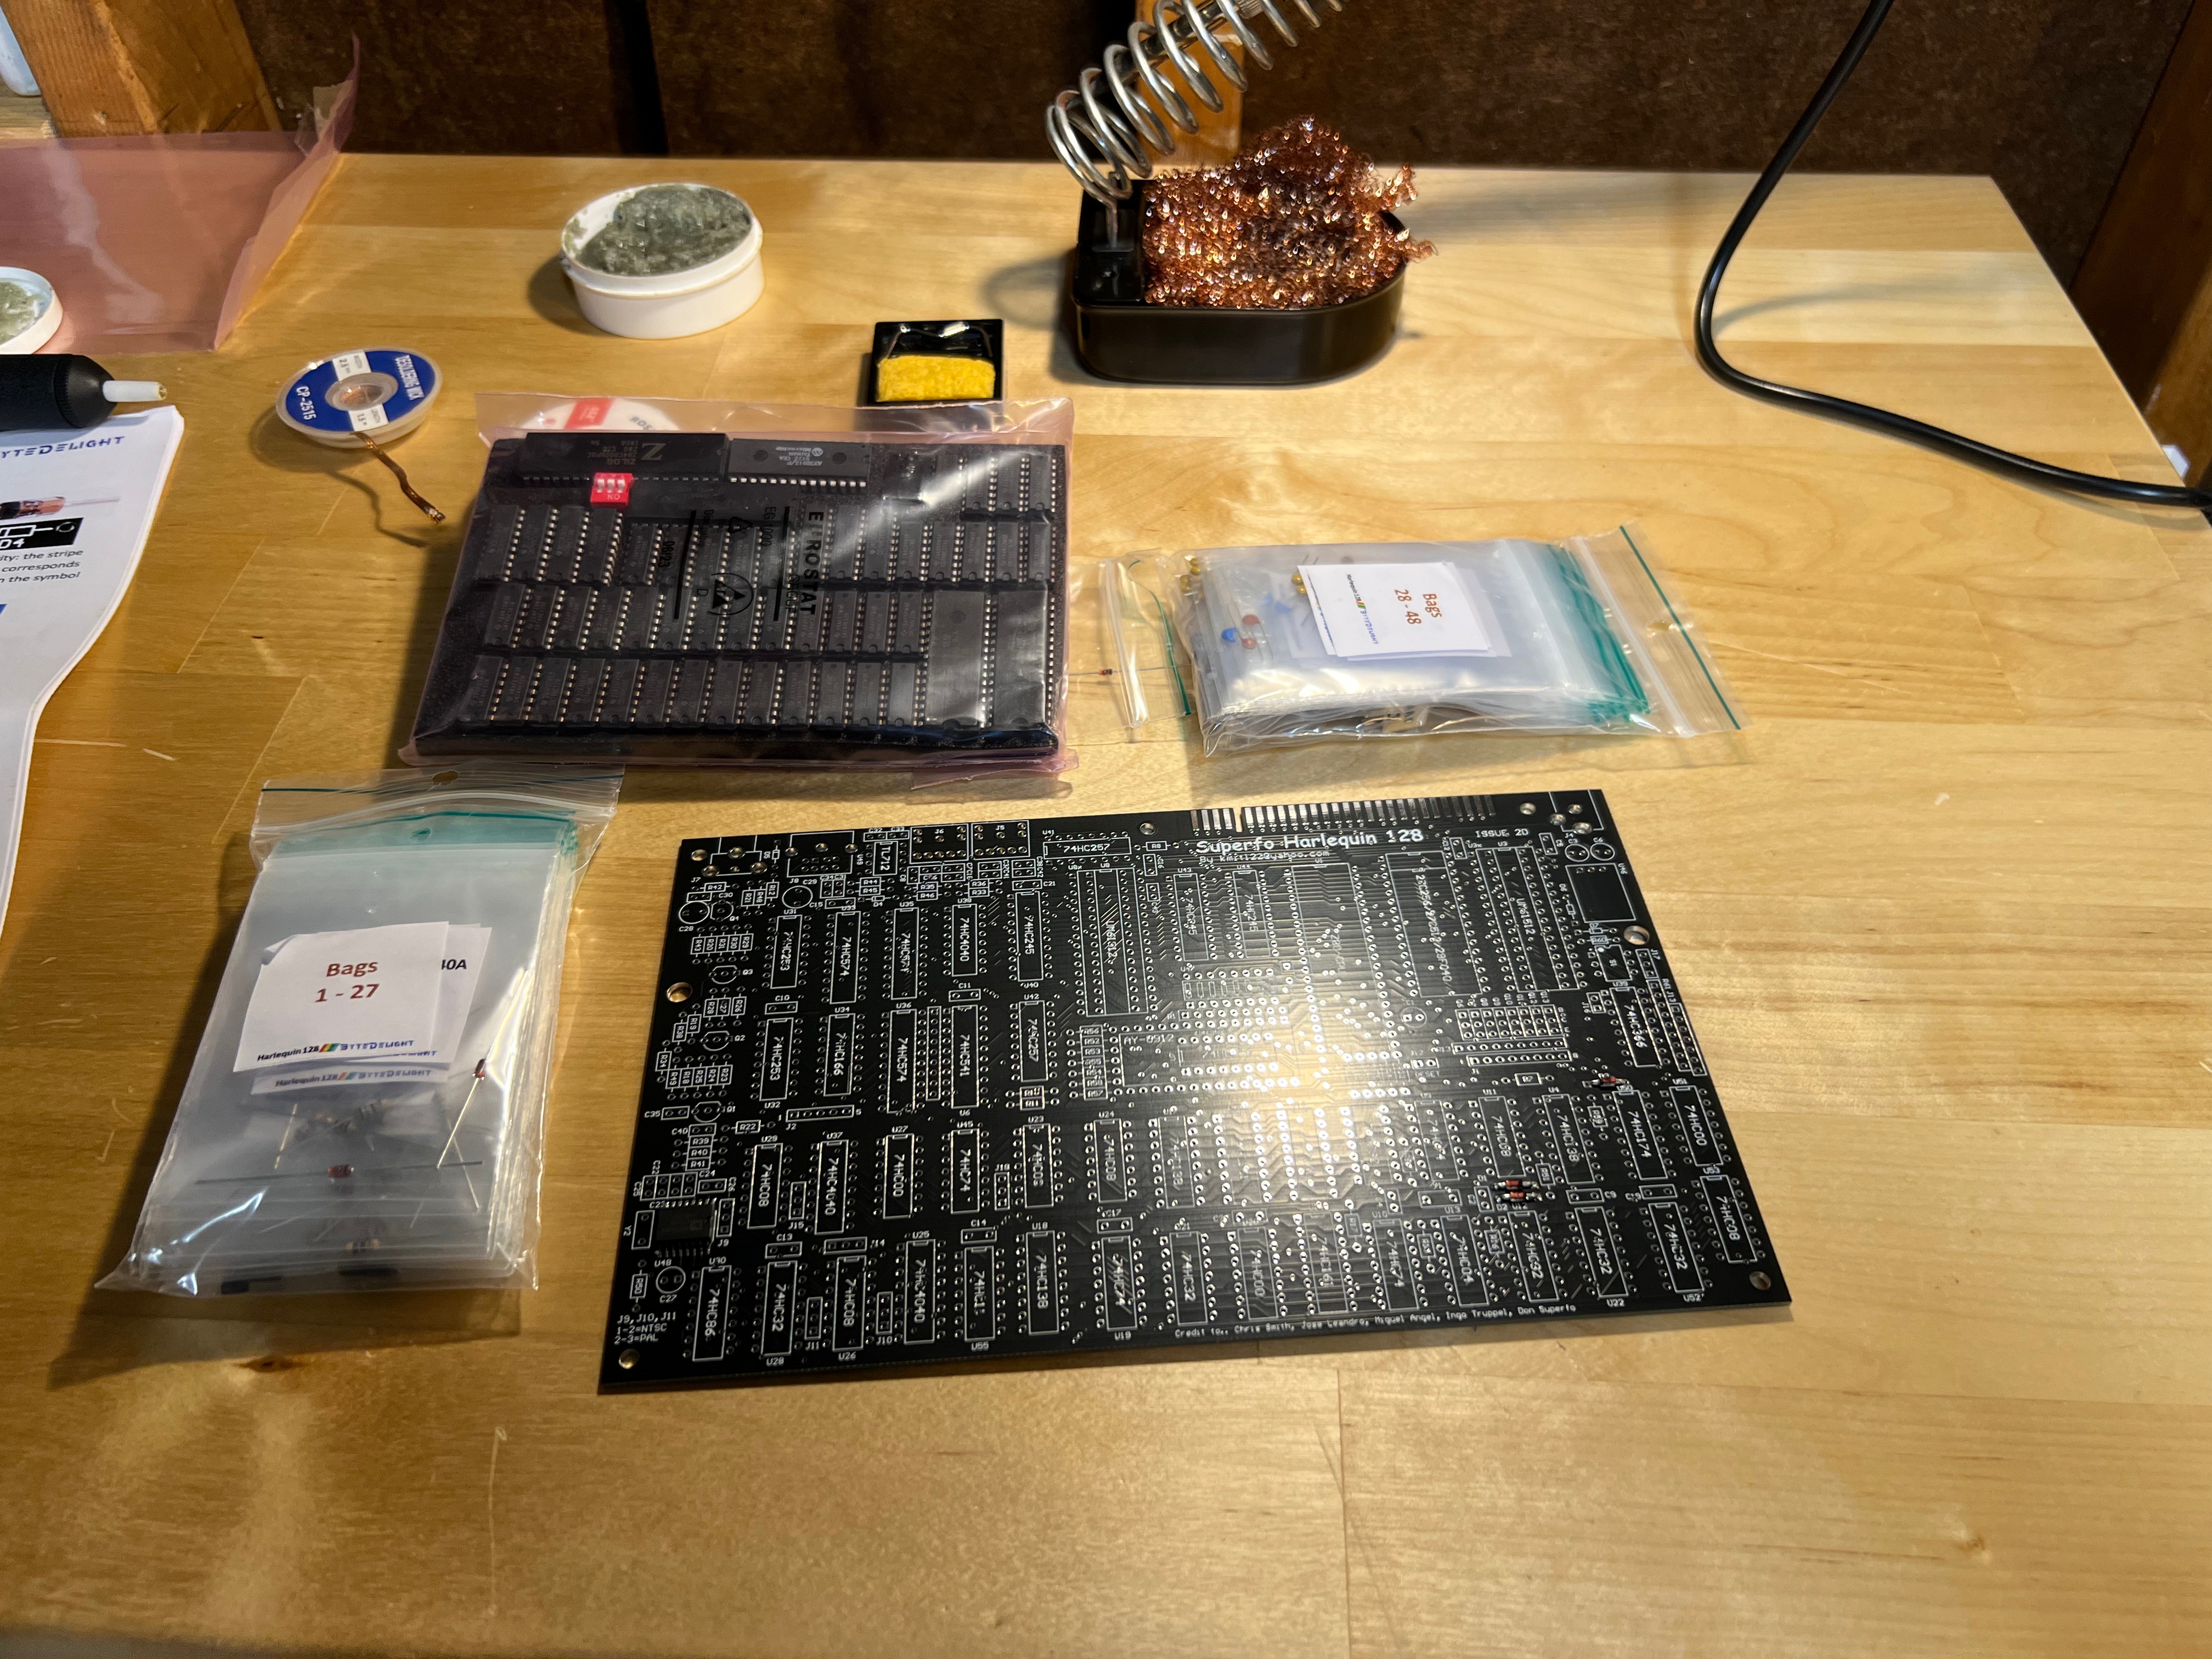
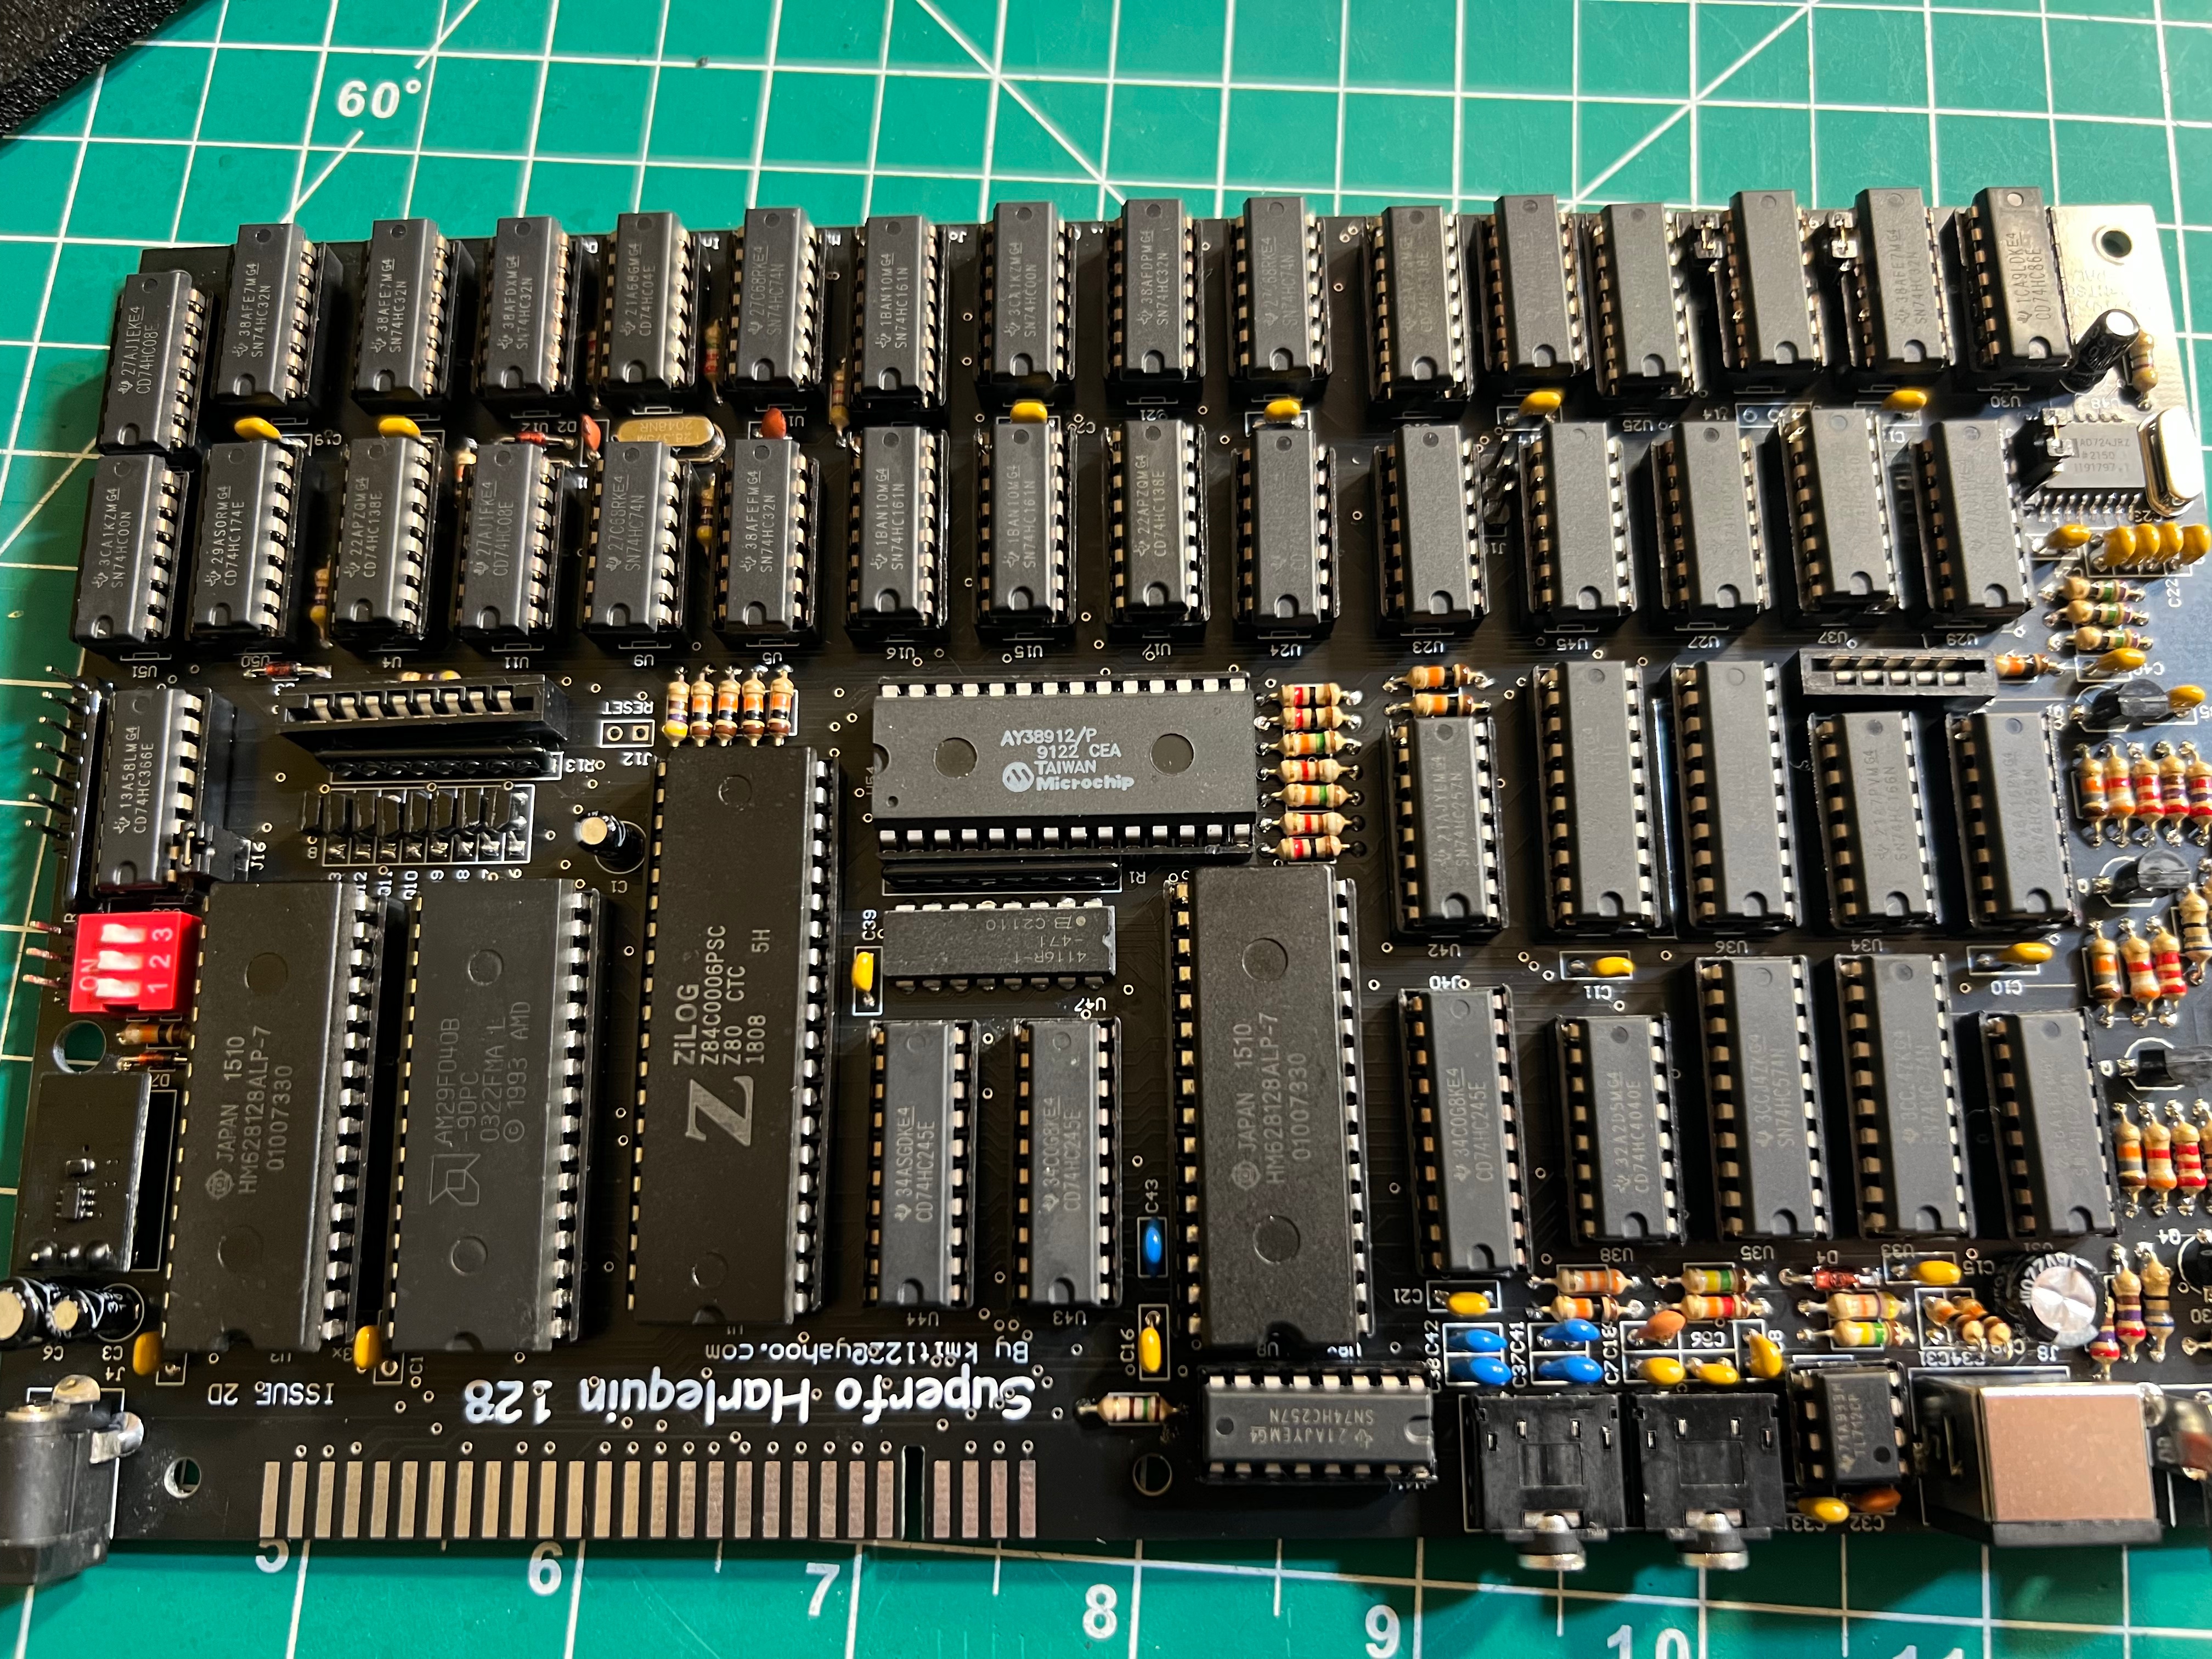
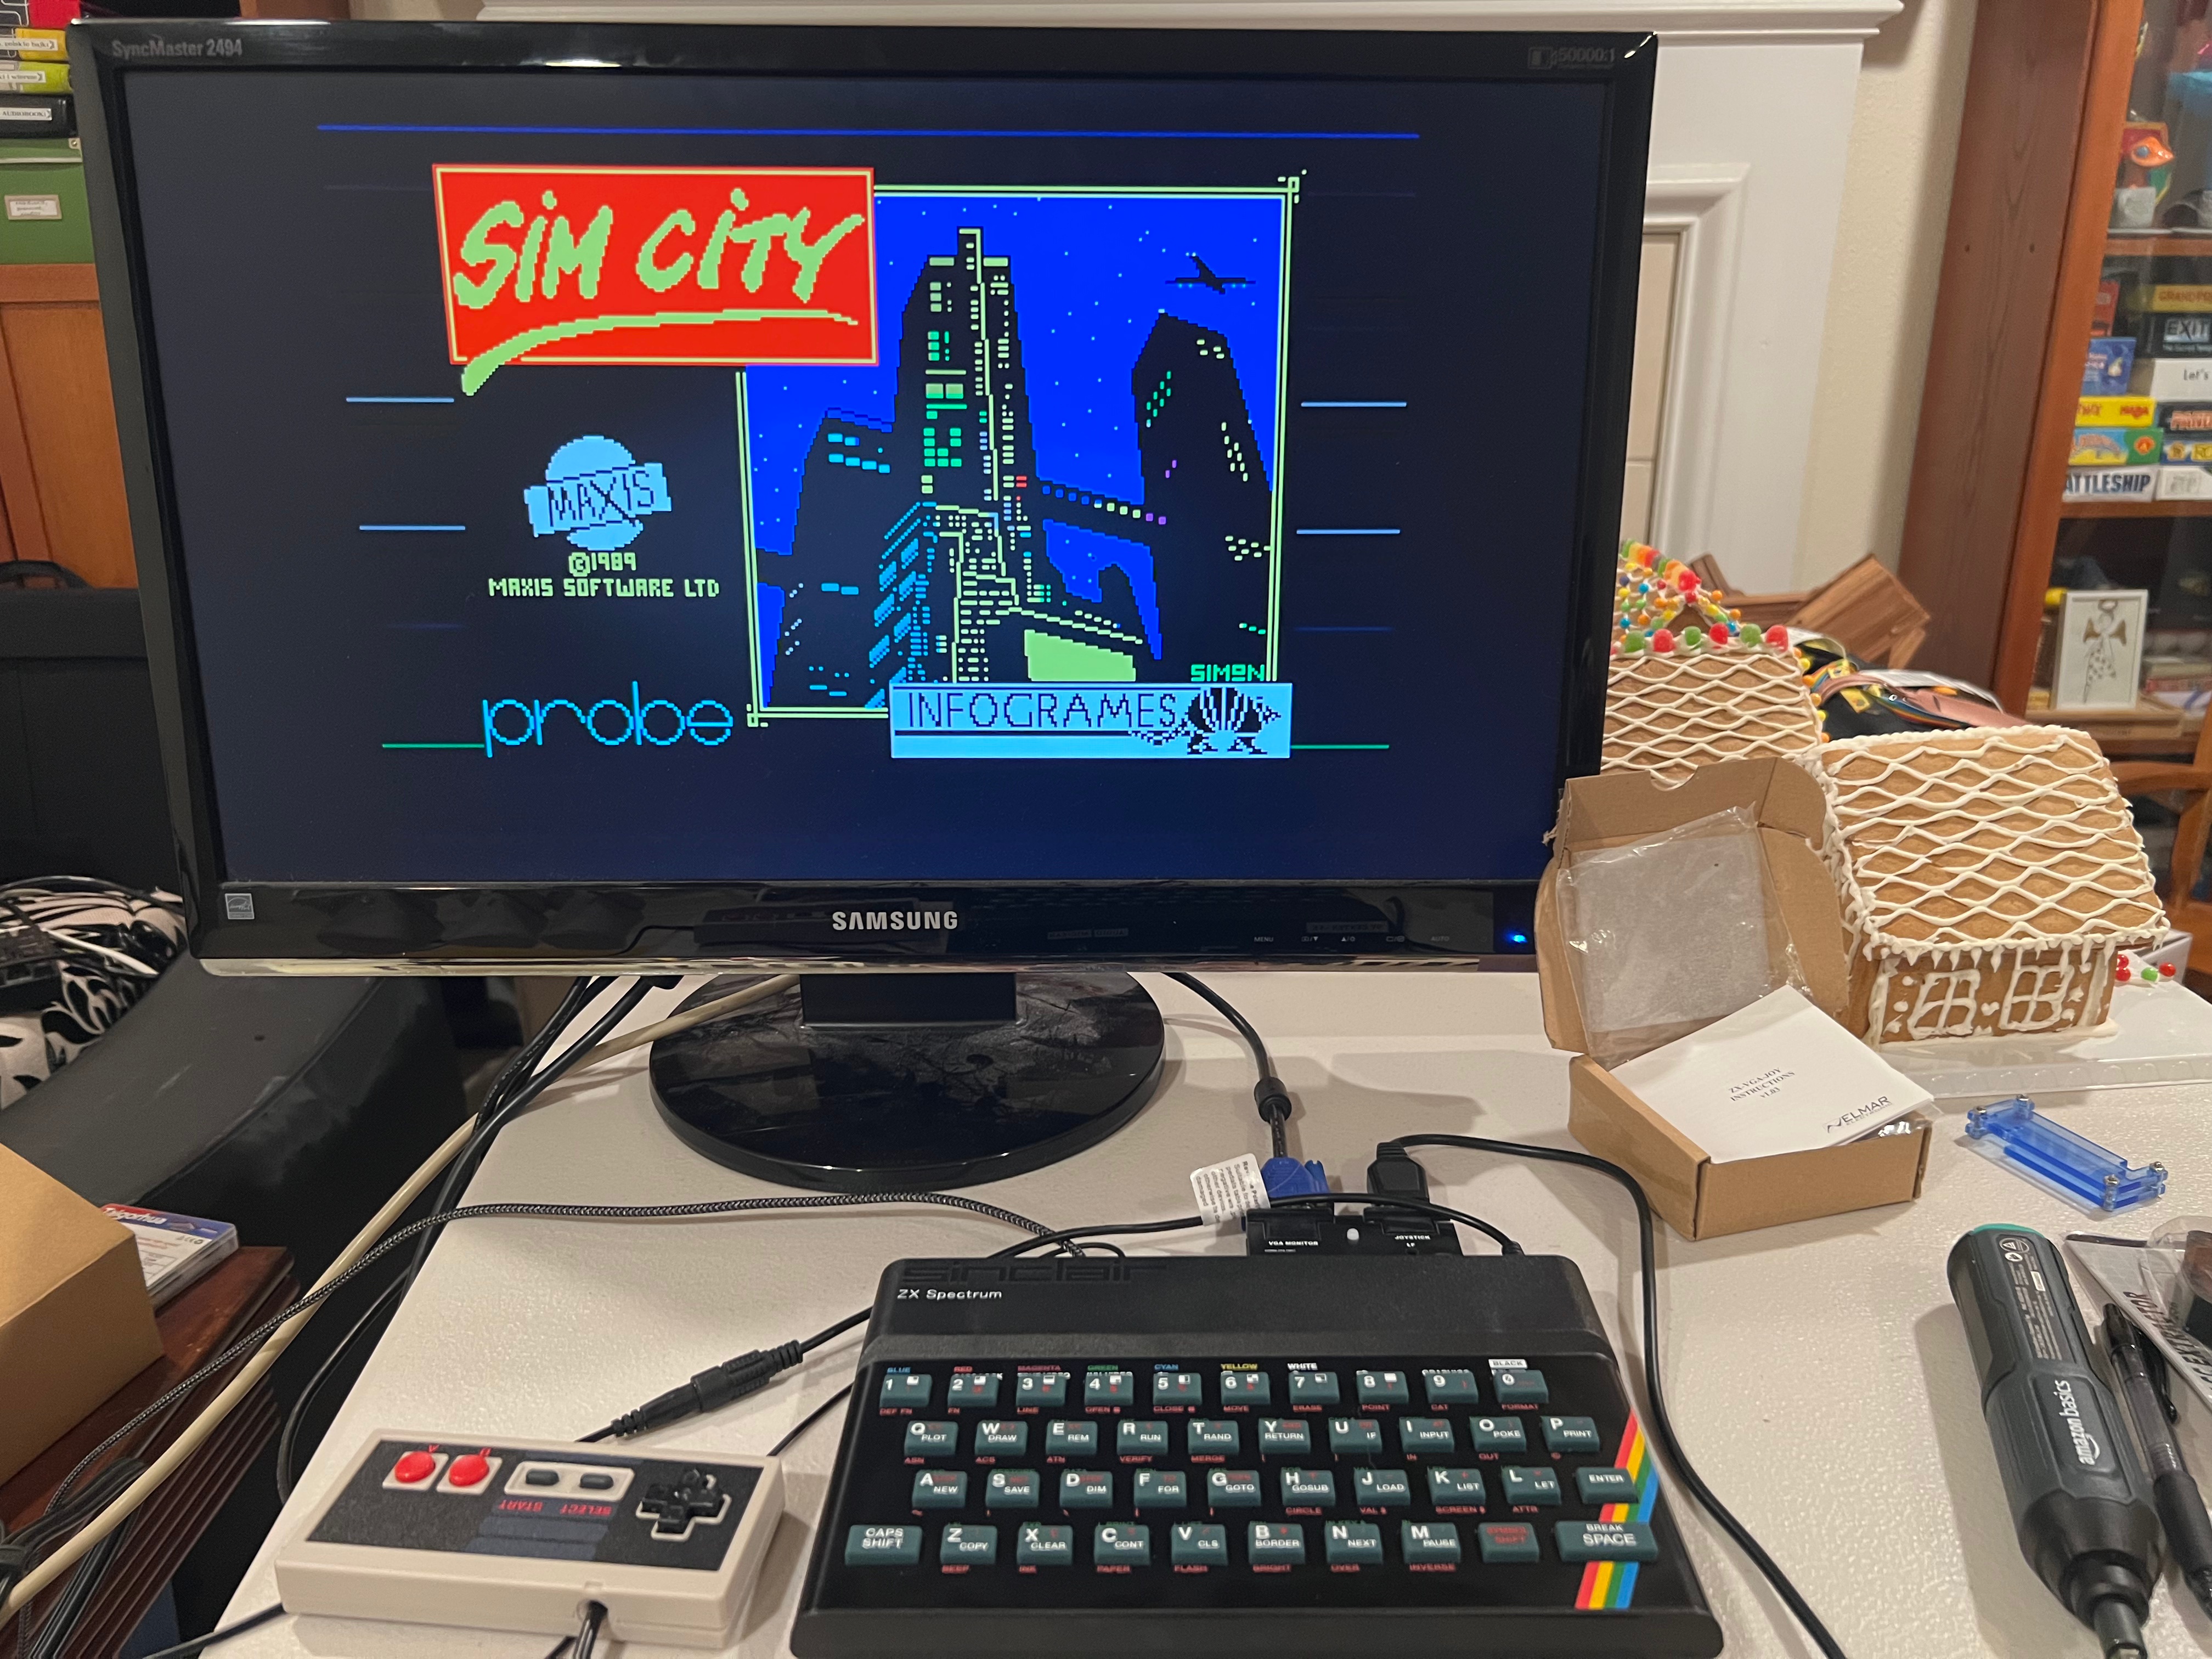
A while ago, I built a replica of a computer that’s older than internet (ZX Spectrum). Because the kit didn’t include the ROM (due to copyright), I essentially built a brick. I hastily ordered a T48 XGecu programmer to bring my new computer to life, but couldn’t make it work with my Mac.

I hoped to find a solution on the official website and was welcomed by this:

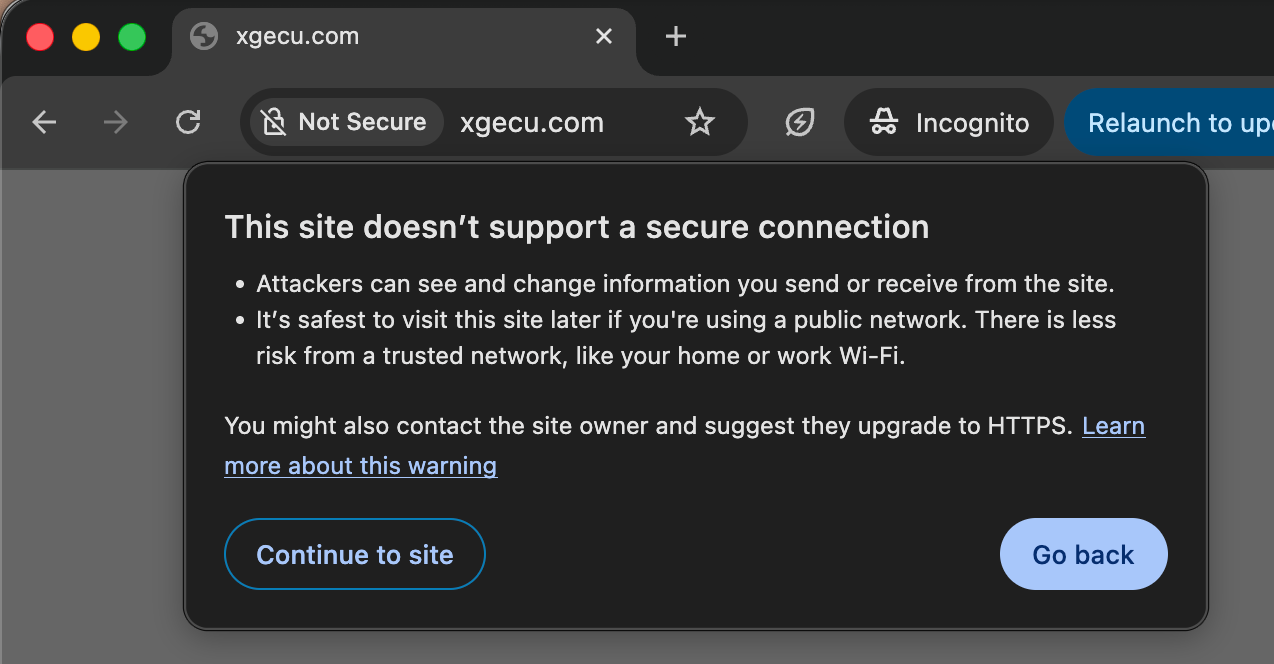
Despite a few red flags, I downloaded the software for my programmer:

It was a .RAR file and I knew what it meant – they only supported Windows!

As a long-time Mac user, I was disappointed. The prospect of installing Parallels only to use the programmer wasn’t appealing. Fortunately, I came across minipro – an open source, command line tool for handling XGecu programmers.

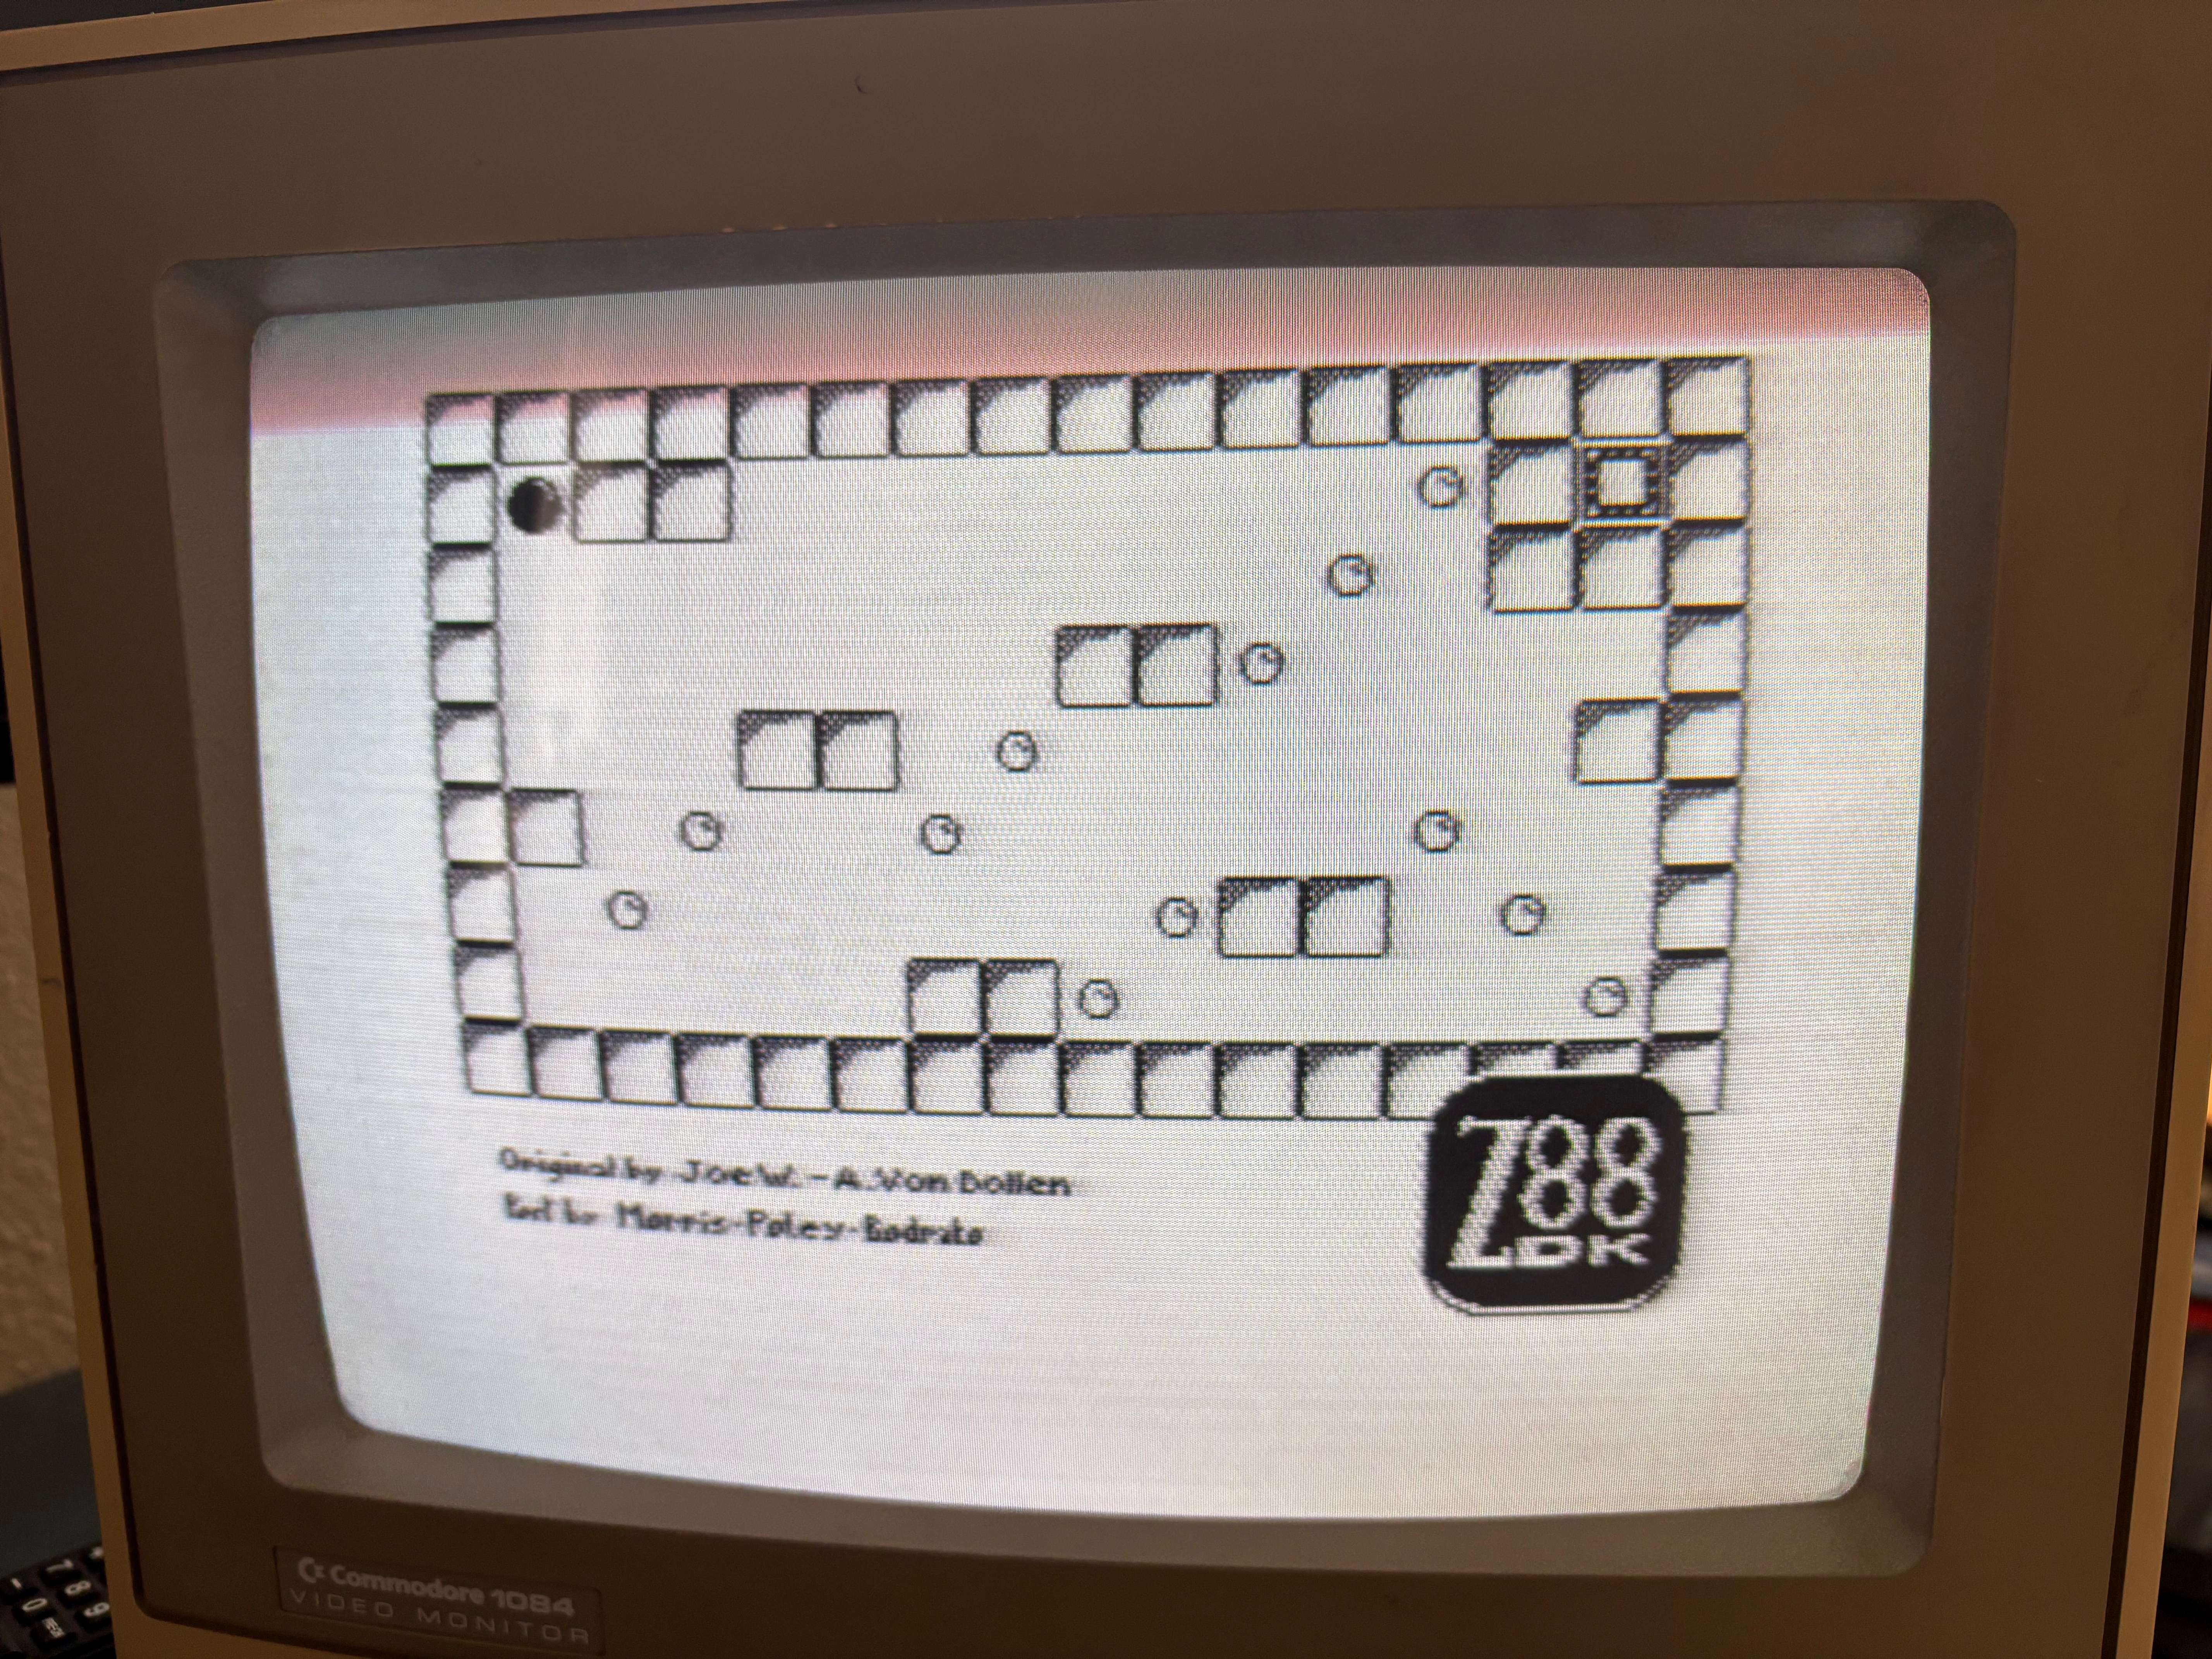
The tool did what it advertised and unblocked my project. However, the version available on brew was outdated and to get something newer, I had to compile it myself.

Parameters were another thing I fought with. I could not remember them and had to refer to man pages dozens of times.

This experience enlightened me – I couldn’t be the only Mac person in the world who wanted to use their XGecu programmer without time-wasting side quests.

The finish line that almost wasn’t

Starting the project took a couple months but finishing it almost didn’t happen.

Visual Minipro wraps the minipro tool. Building an MVP was relatively quick because minipro did all the heavy lifting. But the App Store doesn’t accept MVPs. All apps need to meet certain requirements to be accepted. Due to the app structure, satisfying these requirements was harder than I expected:

  • bundling – App Store apps are sandboxed and can’t access files outside of the sandbox. Ensuring that external tools and dynamic libraries can be loaded correctly is tricky.
  • signing – Apple requires all App Store apps to be signed. XCode handles signing the application but I couldn’t find a way to make it sign dependencies like mine.
  • permissions – the app got rejected by App Store twice due to permissions. One claim was valid (I thought I needed a permission while I didn’t) but the other was not and required a little back-and-forth to convince them that apps handling USB devices require the USB permission
  • universal binaries – the first version of the app only worked on Apple Silicon. I decided to add support for Intel based Macs after a few people asked for it. Building universal binaries for dependencies turned out to be a bit of work because their build scripts only supported the current architecture. Testing was even harder – I only had a no longer supported 2015 MacBook Pro where many newer SwiftUI features weren’t supported.

Solving these problems took enough of my time that I almost started working on a new idea. But I persevered and learned (or re-learned) a few things:

  • shipping software is hard
  • the last 10% takes more time than the first 90%
  • XCode works reasonably well for main scenarios but things get hairy when you get off the beaten path. Fortunately, Apple has command line tools accompanied by posts from around 2013 that explain how to deal with these scenarios (reading these posts is a pain)
  • the App Store app review is not as bad

Memorable moments

First Sale

My first sale surprised me. Not because it came so quickly, but because I learned about it from an unexpected channel after I almost forgot about Visual Minipro.

In the beginning, I was checking my stats daily hoping to see some movement. Looking at zero sold copies got boring and then even depressing, so I stopped. A few weeks later, I received a bug report claiming the app didn’t work. After a short investigation, I concluded the person was building the app from sources and didn’t correctly bundle minipro. I recommended getting the app from the App Store where I knew all components were bundled correctly. To my surprise, they said they did use the version from the App Store.

I checked the App Store dashboard – it did show one copy sold!

(and the problem turned out to be an environmental issue – the app worked fine on a different Mac)

Liquid Glass fiasco

In late December 2025 I noticed an increase in refund requests from App Store but couldn’t figure out the reason. Then, in January, I installed macOS 26 (Tahoe) on my Mac and it became obvious. Liquid Glass made my app look so bad that it became unusable – even I felt lost. I dropped everything and submitted a new, fixed version of the app the same evening.

App Store Small Business program

Seeing Apple taking 30% of $30 I made selling a couple copies of my app made me sad. Finding out they have a program that reduces their commission to 15% for small developers if you apply, made angry.

I heard about Apple introducing the App Store Small Business program as a side effect of the Epic Games v. Apple lawsuit. But it was in 2020 and I had long forgotten about it. I was reminded about the program by a random reddit post. I applied and forgot about it again because I didn’t hear back. It took Apple more than three weeks to process my application and confirm I was eligible.

Show me the money!

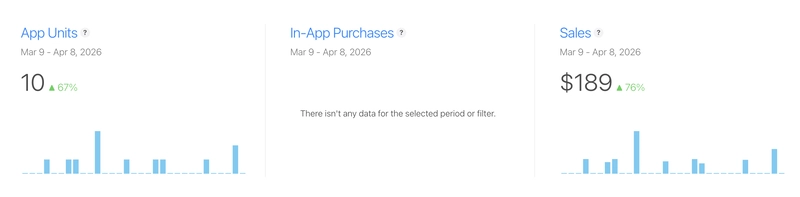
Visual Minipro is a niche app. I won’t claim it makes thousands of dollars in ARR or that it will allow me to retire early. It does, however, make enough to cover the cost of my domains, hosting and dev subscriptions.

Why I think the app sells?

I will be brutally honest – I found a few alternatives to Visual Minipro and they did look better. But all of them had the same fundamental problem: friction.
Assuming you even find one of these apps, the first step is to compile them. If you want to keep it up-to-date (if it’s still maintained) – you will have to periodically check for new releases and recompile them. As soon as get a new laptop, you guessed it right: you will have to compile it again, but first you need to find and install all tools and dependencies.

And, unless you read all the code carefully, you’ll never know what you’re compiling.

Getting an app from the App store is much more convenient and almost risk-free. No time wasted on figuring out dependencies and make files. Automatic updates. Clearly stated permissions. In the worst case, if you don’t like the app, you can request a refund.

What kept me going?

I almost gave up working on Visual Minipro several times. The two main reasons I didn’t:

  • Scratching your own itch – I wanted an app like this for myself. I find it useful, and even if no one buys it, I will keep using it.
  • Product/market fit – Visual Minipro is filling a real gap in the market. The XGecu programmers are quite popular and I was surprised they only supported Windows.

What’s next?

I am maintaining the Visual Minipro app by fixing issues and adding new features. These updates are primarily driven by user feedback and my own observations. I am also trying new ideas because this project taught me I am capable of finishing them.

Building a Computer That’s Older Than the Internet

Monty Python is awesome. But there is one thing the Brits gave to the world that is even better: the ZX Spectrum.

Introduced in 1982, the ZX Spectrum was a computer that sparked the home computer revolution in Britain and, due to its affordability, in many other European countries. The basic version had 16 KB of RAM, while the enhanced version boasted an immense 48 KB.

Though I’ve never owned a ZX Spectrum, it is close to my heart. It was the first computer I had a chance to work with. The computer club I was going to as a kid had a dozen of these computers, and we couldn’t wait for the teacher to finally stop talking and let us play some games.

Fast forward 40 years, and while browsing eBay, a brand-new replacement case for a ZX Spectrum showed up in my search results. The memories came back, and I impulse-bought it immediately. I didn’t have any plan for it, but once I got it, I knew I had to put it to good use, i.e., build a ZX Spectrum replica.

Getting started

A nice case is a good start, but what goes inside is key. I found a few interesting options, but the Harlequin 128K Kit from ByteDelight was by far the best. This kit contained everything I needed to build a fully functional ZX Spectrum.

When I received my Harlequin 128K Kit, I felt overwhelmed. While the ZX Spectrum had only a handful of chips (not counting RAM), this kit had more than 50. There is a good reason for this – the kit uses widely available, off-the-shelf chips to emulate the ZX Spectrum’s ULA (Uncommitted Logic Array) specialized chip that went out of production almost 40 years ago.

I had never done much soldering, and the 50+ chips alone meant hundreds of solder joints. But there were also resistors, diodes, transistors, etc. The website promised it would be a fun challenge and that basic skills and creativity were enough to pull it off. These were encouraging words, but what the website didn’t mention was that a single mistake would ruin it all.

To make the assembly process easier, the kit parts were divided into 40 or so clearly labeled bags and provided with the recommended installation order. The detailed assembly guide included additional hints and called out easy-to-miss gotchas. Given my skill level, I found the kit’s organization extremely helpful.

First Try

The instructions said the soldering would take a few hours. Indeed, I spent a few hours a day for a week building the board. I followed the assembly steps very closely because I knew troubleshooting any non-obvious issues would be beyond my abilities. Eventually, I emerged from my garage with the board, anxious to try it.

I connected it, and what I saw made my heart sink.

If the board had been completely dead, I might have hoped I had missed a connection, but what I saw indicated a subtle issue I doubted I could fix. A quick Internet search only confirmed my suspicion. A few people reported similar symptoms, but no one could propose a reliable fix.

I verified that all the chips were inserted correctly and pressed them down firmly to ensure good contact. I inspected my soldering but didn’t find any missed solder joints. I double-checked the jumpers and found that a couple of them controlling the video settings were misconfigured. I corrected them, but nothing changed. Frustrated, I gave up.

Round 2

The problem haunted me. A week later, I went over everything again and confirmed I hadn’t missed anything. As I was out of ideas, I started playing with jumpers for ROM selection. To my astonishment, one of my changes produced this screen:

This meant the board had been working fine all along! It was just trying to run some garbage instead of a valid ROM program.

ROM

I turned to the guide to understand what was happening. Due to copyright, the kit doesn’t ship with the original ZX Spectrum ROM. Instead, it comes with the AM29F040B EEPROM, which is big enough to hold up to 8 different ROM images. The board uses jumpers to select the image to run. Apparently, some of the banks in my EEPROM didn’t have a valid ROM image, and my initial configuration happened to point to one of these banks.

Now that I understood the issue, the fix was easy: I needed to burn the ZX Spectrum ROM into my EEPROM. The only problem was that I didn’t have an EEPROM programmer. After some research, I settled on the XGecu T48 EEPROM programmer. When I got it, I was unpleasantly surprised: the official software only supported Windows, but I am a Mac user.

I sacrificed a lot for this project, but having to install Parallels would be too much. Fortunately, I found an open-source command-line tool called minipro that offered what I needed.

The Harlequin 128K board I built was compatible with both ZX Spectrum and ZX Spectrum 128. Because my EEPROM could hold multiple ROM images, I burned them both so I could easily switch between them.

Visual Minipro

While the minipro tool did the job, setting it up and understanding the options took some effort. A UI version of the tool would make everything so much easier. As nothing like this existed, I decided to build it myself. Because my tool is a minipro GUI wrapper, I called it Visual Minipro and made it available on the Mac App Store.

Finishing the build

I was delighted to see my board up and running, but two problems bothered me: the video quality was pretty bad, and I couldn’t use a joystick.

Video

The Harlequin 128K board offers two video outputs: composite and RGB. The RGB signal is intended for use with SCART, which has never been a thing in the US. Since none of my monitors supported SCART, composite video felt like a better choice. Besides, exposing the RGB socket would require cutting a hole in my case, which I didn’t want to do.

To get NTSC timings over composite video, I installed the NTSC crystal that came with the kit. It did the trick, but the result wasn’t great. The picture on my 1084S monitor was blurry, and when I tried to convert it to HDMI using my Retrotink 2X Pro converter, I got no color.

Joystick

In the 8-bit era, a joystick was a must-have device. Most games couldn’t even be played without a joystick. While the ZX Spectrum didn’t support a joystick out of the box, third-party joystick interfaces quickly filled the gap. The most popular one was the Kempston joystick interface.

The Harlequin 128K board has built-in support for the Kempston joystick interface. This is nice, but there are two problems: the ZX Spectrum case lacks a factory-made hole for a joystick port, and the board lacks mounting points for the DB9 joystick socket. So, even if I had modified the case, that case might not have been strong enough to provide solid support for the joystick port. Besides, I knew the DIY joystick hole would look ugly. So, I decided to look for something different.

ZX VGA Joy to the rescue

One popular way to get HDMI output on the ZX Spectrum is ZX-HD, an HDMI interface for the ZX Spectrum. It is a fine device, but it wouldn’t solve my joystick problem. So, I kept looking for alternatives and found something that fit my needs perfectly: ZX VGA Joy. This device could output digital video over HDMI and provided a joystick port compatible with the Kempston interface. As a bonus, it also had the reset button.

I ordered it, and couldn’t wait to try it. When it finally arrived, I wasn’t able to make it work with my setup reliably – the screen would go black soon after turning the Spectrum on. Quick debugging proved this was an issue with the computer – the composite video worked just fine. After reading more about the inner workings of ZX VGA Joy, I got a hunch about what was happening. ZX VGA Joy relies on PAL timings to generate the HDMI output. But my computer had the NTSC crystal installed. My hypothesis was that this difference was responsible for the glitch because the PAL and NTSC frequencies differ.

My guess was correct. Replacing the NTSC crystal with a PAL crystal indeed fixed the blank-screen problem, but it came at a cost. After installing the PAL crystal, I lost the ability to use the composite video. This wasn’t a big deal, though. Given the low quality of the composite signal, I wouldn’t want to use it anyway.

Final result

Here is the final result after putting everything together (with a modded Nintendo NES controller in lieu of a joystick and the original SimCity game humming happily on 48 KB of RAM).

Conclusion

There is no practical reason to build a 40-plus-year-old computer today. To be honest, even when I was starting, I didn’t expect to really use it. However, the process of building it, the interesting technical challenges, and the satisfaction of seeing it come to life were all well worth it.

Using mental models to think about software

No person can function properly without building mental models to understand the world around them. The reality is simply too complex to deal with as is, so we need to abstract it.

Software is no different. The complexity of software systems has been only growing. As a result, the ability to quickly build mental models and use them to reason about these systems is an important software engineering skill.

Building good mental models is important because they allow us to better communicate with other software engineers, explain our ideas, and understand the impact of our changes on our software.

Building mental models

Reasoning about software systems requires building mental models that represent them. The granularity of these models depends on their purpose. Often, one level of granularity is not sufficient. The most effective software engineers can quickly build a few models and switch between them depending on the situation.

For example, if your team owns a few services, you can draw a lines-and-boxes diagram where boxes represent services and lines represent dependencies. You can then zoom in and build a model for each service. These service-level models could illustrate interactions between the libraries a service consists of. If you want more details, you can create a class diagram. You can continue zooming in and focus on methods, code blocks, statements, etc.

Each of these models describes your system at a different level of granularity and has a unique set of applications. The high-level model could be useful to troubleshoot larger outages (or when talking with your director) but is unlikely to help you fix a small bug. The more detailed models are best suited for solving gnarly issues but won’t be helpful when explaining your infrastructure to other teams.

Building models covering different aspects of the same system is also common. If you want to analyze your system from the security perspective, your model will include different details than when focusing on performance.

Caveats

Mental models are so natural to people that we often forget about their flaws.

All models are wrong

Models, by definition, ignore details. As they only capture certain aspects of reality, they are inaccurate. Furthermore, some relevant information is often omitted because it doesn’t fit the model. Edge cases are an excellent example.

For instance, when software developers explain how their code works, they rarely mention error cases. They focus on their ifs and fors and the program flow but omit exceptions because exceptions make their model murkier. The problem is that error scenarios are important. Incorrect or missing error handling is a common cause of system outages.

Models get more wrong with time

The world, including our software systems, is in constant flux. But mental models don’t automatically keep up with changing reality. Outdated mental models lead to misunderstandings and bad decisions.

I experienced this very problem recently. I started working on a feature that depended on a system I had never seen changing. Everything was going swimmingly, and I only needed to tie up a few loose ends related to some new data requirements. But when doing this, I discovered, to my dismay, that the system I depended on had recently changed. It had been updated to accommodate the same data requirements I struggled with. Making my feature work now required additional information I didn’t have. Plumbing this data meant revisiting my implementation. Working off of an outdated mental model cost me implementing my feature twice.

No two models are identical

Building mental models requires deciding which details are important depending on the purpose of the model. However, even if the purpose of the model is well understood, different people will consider different information relevant.

Also, mental models built at different times will naturally differ because they capture different system versions.

The interesting fact about this phenomenon is that the overlap between mental models built by different people is usually significant. The differences are often discovered unexpectedly, e.g., when discussing small but important details.

Overthinking Software Projects

“Weeks of coding can save you hours of planning.”

Most developers learn this truth the hard way. I did when I implemented a feature based on incorrect assumptions, and the only way to save it was to rewrite it.

While junior engineers often fall into the trap of jumping straight to coding without thinking about the problem, more senior engineers fall into a different trap: overthinking.

Senior developers are routinely responsible for projects requiring a handful of engineers and a few months to complete. There is no way to execute these projects without careful thinking and planning. Even if you wanted to start coding on the first day, you couldn’t. You simply wouldn’t know where to start.

The top priority in the initial phases of bigger software projects is to sort out the ambiguity that blocks development. The most common way to do this is to devise a design that will guide the implementation.

The tricky part is that figuring out the design is by itself an ambiguous problem. There is usually more than one way to implement the solution, and many constraints and requirements are unclear. Even estimating how long it will take to prepare the design can be difficult.

All these uncertainties put pressure on the engineer(s) responsible for the project. Making a bad decision can lead to wasted time (amplified by the size of the team) or even a project failure.

The “Am I Overthinking This?” book cover
The “Am I Overthinking This?” book cover.

When stakes are high, it is natural to proceed carefully, explore potential problems, and work with others to identify gaps that may otherwise go unnoticed. However, setting limits for these activities is crucial. Failing to do so will inevitably lead to overthinking, which can also put the project at risk due to:

  • Delays – analyzing every imaginable scenario takes a long time and will eat into development time, making meeting expected timelines impossible.
  • Overengineering – trying to address minor or hypothetical issues leads to overly complex designs that are hard to implement and expensive to maintain.
  • Missed opportunity – endless discussions, revisions, and feedback rounds steal time engineers could spend on other project activities or elsewhere.

How do you know if you are overthinking?

One of the problems with overthinking is that the line between productive analysis and overthinking is thin and easy to miss. However, there are signs of getting there:

  • Although all critical requirements have been satisfied, new requirements are being added.
  • The same topics continue to be discussed repeatedly without reaching any resolution.
  • Edge cases, minor issues, and esoteric scenarios start to dominate the discussion.
  • The debate moves to future scenarios that are out of the scope of the project at hand.

What to deal with overthinking?

It is important to understand that the goal of the planning and design phases is not to identify and solve all possible problems. First, it is impossible even to list all the issues. No matter how much time you spend thinking you will miss something. Second, many problems will never materialize, or if they do, their impact will be minimal. To focus on what’s important, create a list of requirements, decide which are critical (the list should be short), and satisfy those. Leave out the remaining ones and revisit them if they become a major problem.

Many problems have no one correct or even best solution. No amount of debate is going to change that. It may take time to arrive at this conclusion, but once it is settled, you must pick one of the alternatives and live with the consequences.

If you are not sure, prototype. An hour of coding can save you a few hours of meetings. Code does win arguments.

Design for your current needs. If you don’t operate at Facebook’s scale, don’t design for Facebook’s scale. Don’t build abstractions for your hypothetical future features.

Accept the fact that things may not work out. Fortunately, you are not pouring concrete. This is software, and the ability to modify it is one of its greatest advantages. You can build small and evolve your solution when your needs grow.

Build vertically. A small feature working end-to-end will allow you to discover issues early and course-correct. If you build horizontally, you won’t see gaps until very late when all the layers are ready. Fixing bigger problems at this stage will be an undertaking.

How to quickly ramp up on new codebases

Joining a new team is intimidating. There is always much to learn – new people, new processes, and a new code base.

Ramping up on your new team’s code base is difficult, but knowing how to work effectively in it is crucial to your success. So, how do you do it quickly?

My mid- and early senior developer years were intense. Due to a mix of reorgs and personal interests, I found myself on a new team every year or so. As a result, I had to learn new codebases in quick succession. They included .NET System.Xml, OData, Entity Framework, Entity Framework Designer, ASP.Net SignalR, ASP.Net Core, and the Alexa mobile app, and most of them were over one hundred thousand lines.

The first couple of transitions were slow and overwhelming. But they helped me develop a strategy I used later to quickly get up to speed on new codebases.

Get your hands dirty ASAP

The sooner you start working actively with the code base, the sooner you will get productive. Reading documentation can be helpful, but nothing can replace the hands-on experience.

When I joined Amazon, I asked my manager to assign me a simple bug to fix on my first day. Even though the fix amounted to a single line of code, it took me a few days to send it for review. It might seem long, but this quest was not about fixing the bug. Rather, it was about forcing myself to set up my development environment, learn how to build and run the code, write unit tests, and debug our product.

Review code

Each team has its way of letting members know there is a new PR (Pull Request) for review. It could be email, chat, or review tool notifications. Whatever it is, subscribe to this channel and start reviewing PRs. You won’t understand much initially, but you may still catch some bugs (e.g., off-by-one errors). More importantly, these reviews will allow you to ask questions and gather a broader context of what the team is working on.

Identify code that matters

The 80/20 rule does apply to codebases. This is especially noticeable in the bigger ones, where most code changes developers make are concentrated in one area. Knowing which code it is allows you to focus your ramp-up on the area you are likely to work on soon.

There are a couple of easy ways to tell which code is in the top 20%:

  • paying attention to code reviews
  • checking the commit history

Take notes, draw diagrams

I discovered that taking notes and drawing diagrams is a very effective way to grok the most complex parts of the code. Call graphs, class diagrams, and dependency graphs all help organize the information and are great reference material in case you need to refresh your memory.

After I joined Amazon, I drew diagrams of a few areas of code I couldn’t understand. They became an instant hit. Even people who had been on the team for much longer than me wanted a copy.

Debug code

Reading a new codebase is like reading a book in a language you barely know. You can do it, but it is excruciating.

For me, one of the best ways to overcome this is to step through the code with the debugger. Initially, I have no idea what I am looking at. But if I follow the same code path a few times, I begin to recognize code I have already seen, and soon, everything starts to fall into place.

To get the most out of my debugging sessions, I do two things:

  • I continuously inspect the state – the stack trace, parameters, and local and class variables
  • I take notes and draw diagrams

Using the debugger to learn the code base is slower and narrower than reading the code. But it is also much deeper. In fact, when debugging, I often realize that the understanding I gained from reading the code was incomplete or sometimes even incorrect.

Read documentation

Reading documentation can help accelerate your onboarding. It could be especially useful when it comes to the high-level architecture and concepts that are hard to deduce from code.

However, you should take documentation with a grain of salt. It is often sparse and outdated. But this could be good news for you. Updating the documentation as part of your ramp-up could be a great contribution to your new team.

Join on-call rotation

Joining the on-call rotation to accelerate team onboarding might sound extreme but I did it on my first team at Facebook. I did it because I was concerned that my ramp-up was slow, so I decided to push myself. I learned more about our services this week than in weeks before. After my shift ended, I knew what services our team owned, their dependencies and where to find their code. Alerts immediately pointed me to the hot code paths, and troubleshooting issues forced me to dig into the code.