Cloud Enabled Commodore 64: Part IV – Retrospective

In the previous post we looked at implementation details of the Cloud enabled Commodore 64. In this post I would like to sum up the project and retrospect of what I might have done differently.

In general, I am extremely happy about how the project turned out. First and foremost – it does work! I was able to put all technologies together and line all the stars up to the point where an almost 40-year-old computer is talking to cloud and thus can connect to other – more modern – devices.

I also have to admit that I am amazed how great the Vice emulator is. I was not confident that it would be possible to implement the project end-to-end on an emulator and – even if it were – that the code would run on the actual hardware without any additional debugging.

Having said that after looking back at this project I found a few things I might have done differently.

Time management

I have not put any timelines on this project. I worked on it only on and off – when the time allowed, and when I felt like it. As a result, it took almost a year to drive it to completion. This was only a hobby project so it is not a big deal, but I feel that if I were more focused, I could have finished it in half of that time.

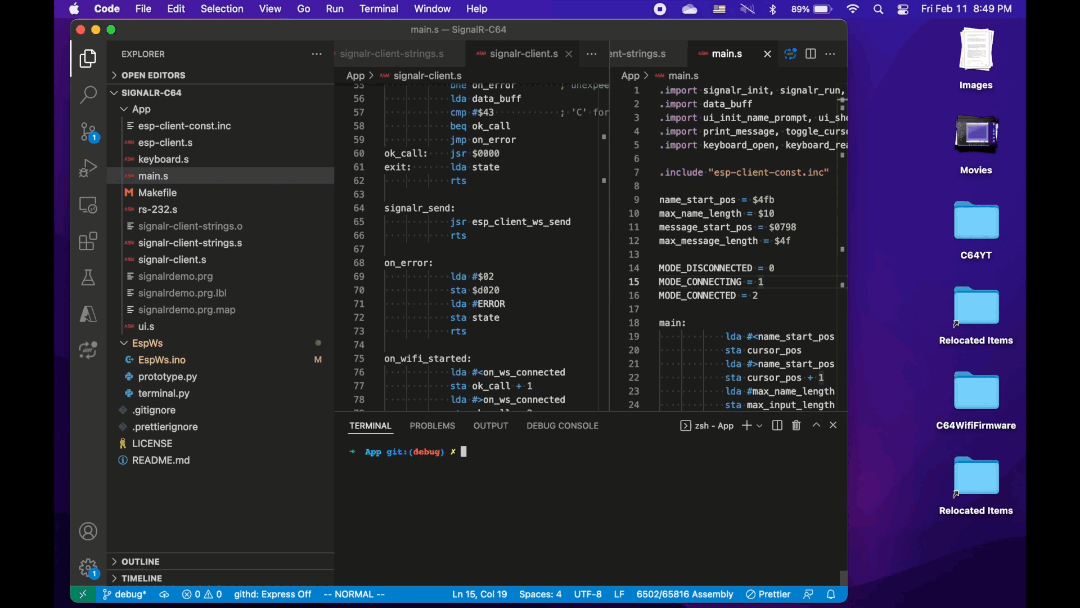
Use the C language instead of assembly

When I embarked on this project, I decided to solely use assembly for the Commodore 64 code. Halfway through I looked more at what the cc65 had to offer and pondered moving to C. There were a few downsides to this approach like the ramp up time or having to figure out how to mix assembly and C especially in the context of interrupt handling. I also was concerned about the size of the binary produced by the compiler. This was probably unreasonable as I did not include any artifacts like graphics or music. Switching to the C language could increase my productivity in the long run, reduce the number of hacks I implemented (especially towards the end of the project) and make the code more accessible.

Run the SignalR client on the board instead of on the C-64

One of the principles of the project was to use the NodeMCU/ESP8266 board only as a simple network card and have the C64 run everything else. I felt like pushing more logic to the NodeMCU board would be “cheating”. Relying more on NodeMCU/ESP8266 could have a couple advantages:

  • having to write much less 6502 assembly and, as a result, potentially finishing the project faster
  • a general use SignalR client in C oriented towards embedded systems

Run serial communication at more than 1200 bauds

To simplify the project, I decided to run communication between C64 and the C64 WiFi modem at 1200 bauds. This is really, really slow. If “1200 bauds” does not tell you much: this is roughly 120 bytes per second. C64 can potentially support up to 2400 bauds. The C64 WiFi modem supports speeds up to 9600 bauds. To run at these speeds, I would have to use special routines for handling serial traffic. This would bring the transfer to almost 1KB/s. To be honest, given today’s transfer speeds, I don’t think achieving 9600 bauds would make any difference. This project does not and will never have any practical use, so 1200 bauds is probably as good as 9600 bauds. We also only have less than 60 KB of memory to fill (after disabling all ROMs).

Addendum

There is a quite hilarious twist to the paragraph above. I wrote it after briefly testing the project on the actual hardware but before making the video I posted on youtube. When I was shooting the video I started seeing garbage on the screen. It started innocently – apparently the exclamation point was not shown properly. I immediately knew something bad was happening because I did have a dedicated code to handle punctuation marks. Nevertheless, I ignored the error hoping it won’t get worse. Unfortunately things went south really quickly – see for yourself:

I took a break to debug the issue and was only able to reproduce it on the actual Commodore 64 but never on the emulator. I concluded that I was hitting one of the bugs in the KERNAL code handling serial communication which would result in occasionally flipping bits. Indeed, after lowering the serial connection transfer speed from 1200 bauds to 600 bauds the problem disappeared. So, for the demo, I ended up with 600 baud for the real C-64 and 1200 baud for the emulator as the emulator did not have any issues at “higher” speeds.

These are my biggest take aways from this project. In the next post I am planning to provide steps to anyone interested in trying this project out on their own.

Cloud Enabled Commodore 64: Part III – Implementation

Once I had a reasonable development environment, I could get my hands dirty and start coding. I decided to re-use a server from one of my other projects, so I only needed to take care of the client-side implementation. It consisted of two main parts:

  • a library running inside the C64 WiFi Modem responsible for networking
  • a chat app running on Commodore 64

Let’s take a closer look at how they were implemented

Networking with the C64WiFi Modem

The modem is responsible for handling network related functionality. It needs to be able to connect to the WiFi network and – once connected – allow to establish a connection with a web server. This functionality is provided by the ESP8266 chip that powers the C64 WiFi modem. The WiFi connection can be established using the ESP8266WiFi library. HTTP requests can be sent to a web server using the ESP8266HTTPClient and the WebSocketClient can be used to communicate with the web server over a webSocket. To expose this functionality to external devices (clients) I created a library running on the C64 WiFi Modem (or, to be more accurate, on the ESP8266 chip) that implements a simple protocol that allows to start or stop WiFi, open a webSocket and send and receive messages over the webSocket. The client would send commands using the serial device and would receive a response containing the result of the operation. Once the webSocket is opened successfully, the client can also instruct the modem to send data to web server or receive data from a web server. The functionality offered by the library running on the modem is not geared towards any specific use case. In fact, testing it from a C-64 would be quite daunting and it was much easier and faster to create a Python client that used the pyserial package to communicate with the modem.

Commodore 64 chat app

The chat app for the C-64 is much more complicated than the library for the C64 WiFi modem. It not only needs to provide the interface for the user but also takes care of all the communication. As I set out to start working on the implementation, I was worried that coding all of this up in assembly will end up in a horrible spaghetti code that no one – including myself – will be able to understand. To prevent that, I decided to go with a layered design where each layer is responsible to handle a single concern and can only communicate with the layer directly above or below. I identified the following layers:

          +----------------------+
          |     application      |
          +----------------------+
          |       SignalR        |
          +----------------------+
          |         ESP          |
          +----------------------+
          | serial communication |
          +----------------------+
                    ...
          +----------------------+
          |    C64 WiFi Modem    |
          +----------------------+

The serial communication layer is responsible for communication with the serial device – it knows how to open the device and allows reading incoming data. The ESP layer understands the protocol implemented in the library running on the C64WiFi modem. It knows how to create and send commands and interpret results. The SignalR layer uses the API exposed by the ESP layer to connect to WiFi, start a webSocket connection to a web server and communicate over this webSocket. It also has some understanding of the SignalR protocol – it knows how to initiate the SignalR connection, handle handshake or ignore “uninteresting” (or unsupported) messages from the server (e.g. pings). Finally, the application layer drives the execution of the entire application. It does that by setting up a raster interrupt which ensures that the application logic will be called repeatedly (60 times per second on NTSC systems, 50 times per second on PAL systems). Each time the interrupt handler is invoked it checks if there are any incoming messages and, if so, shows them on the screen. The interrupt handler also scans the keyboard and will take care of sending a message if the user pressed <RETURN>. All the code responsible for UI is encapsulated in a dedicated UI module. Sending and receiving messages directly in the application layer is a bit messy because it also includes logic that encodes and decodes messages according to the SignalR protocol and the MessagePack format. As per the layering above this should ideally be part of the SignalR layer but doing this in the application layer proved to be easier to implement and faster to run (important due to the timing constraints related to running inside the raster interrupt handler which needs to finish within at most 16 ms). Given this was just a hobby project, I decided that this trade off was acceptable.

In addition to the layered design, I also settled on using several patterns that helped me avoid mistakes and a lot of debugging:

  • arguments are passed to subroutines in registers, if possible
  • subroutine results are passed in registers, if possible
  • subroutines are not expected to preserve registers – the caller is responsible to preserve registers if needed
  • Some zero-page locations have a specific purpose (e.g. $fb/$fc vector always points to the send buffer) while other (e.g. $fd/$fe) can be used for any purpose and by any subroutines so no code should use them without proper initialization

Pivots

During the implementation I found that the project would get significantly easier if I changed some of the assumptions I originally made. Initially, I planned to communicate with the server using the long polling. Long polling (a.k.a. Comet) is a technique where the client sends an HTTP request and the server keeps it open until it has anything to write, or timeout occurs. Once the HTTP request is closed the client immediately sends a new HTTP request. This pattern is repeated until the logical connection is closed. Sending data to the server requires sending a separate HTTP request. When researching this option, I found that the ESP8266HTTPClient is blocking and does not allow working with more than one connection at the same time. I needed something better and I found the WebSocketClient library. Using webSockets was a much better option and saved a ton of work. I no longer had to deal with coordinating and restarting Http requests (which can get tricky) and establishing the connection to the server was greatly simplified as SignalR requires an additional negotiate request for the Long Polling transport but not for the webSocket transport.
I also decided to switch to a binary SignalR protocol. Out of the box, SignalR uses a JSON based protocol. This makes using it from JavaScript extremely easy. For other languages it usually does not make much difference as JSON support is widespread. JSON however is not a good fit for assembly. Even if I found a parser, I would only use it if I did not have any other option (the size of the parser and the speed of parsing were some of the concerns). Fortunately, SignalR also supports encoding messages as binary data using the MessagePack format. Binary format was a much better option for what I tried to do. First, the messages are much smaller. This was important because I decided to support only payloads of up to 256 bytes since 6502 has only 8-bit registers. (One of the consequences of “8-bit registers” is that indexing memory chunks of up to 256 bytes is easy with the Absolute Indexed addressing mode while working with bigger buffers is much more involved.) Second, parsing binary messages is much easier than JSON encoded messages as there is only one way to encode the message. I also only needed to implement a small subset of MessagePack features to be able to support my use case.
There was one more place where I switched from text to binary. The protocol I created to talk to the C64 WiFi modem was initially text based. The biggest advantage was that I could test it without using any specific tools – I would just start screen or PuTTY and could type commands directly from the keyboard to see if things work. Interpreting data received from the modem in assembly turned out cumbersome (but worked!) but after I decided to move from JSON to MessagePack using a text based protocol for the communication with the modem was no longer an option. I had to create a couple of tools in Python to make testing easier but the simplification it yielded in the chat app was totally worth it.

The implementation for the Cloud Enabled Commodore 64 required aligning many stars. Keeping clear boundaries, using the right tools and a bit of luck was essential to complete the project successfully. Revisiting assumptions, adjusting the direction and finding simpler solutions cut a lot of time and effort. Next time we will take a look at more ideas I had and how they could have shaped the project if I decided to use them.

Cloud enabled Commodore 64: Part II – Development Environment

After devising a high-level design for my idea, I needed to take care of more mundane things, starting with setting up the development environment. First, I had to find out if using a Commodore 64 emulator for testing and development was an option. I wanted to rely on the emulator as much as possible to speed up the development time. The main two concerns I had were:

  • would the emulator even support external devices?
  • if, the above was true and my idea worked on the emulator, would it work on real hardware

Vice-64 was the most advanced and mature Commodore 64 emulator I knew of. I used it previously in some of my projects (e.g. Vintage Studio) and to occasionally play some of my favorite games but never with any external hardware. Looking at Settings gave me hope – I found that there were at least controls allowing to configure serial communication. After playing with the settings for a bit I was able to make Nova Term connect to a BBS via the C64-WIFI modem connected to my laptop via USB. This answered my first concern and assured that I would be able to code and test the entire solution on my laptop with maybe some additional debugging on the real C-64 at the very end. Another benefit of using Vice was access to the built-in debugging tools. They allow setting breakpoints and stepping through the code and the support for labels makes debugging much easier.

Next, I had to decide on which 6502 assembler to use. I found ca65 (a part of cc65 suite https://github.com/cc65) to be the best option. It has a lot of great features, has been around for a long time and has a lot of documentation as well as source code available on github. I was almost sure that VS Code was the safest bet to serve as my 6502 assembly editor as it has a ton of extensions. The main thing I was looking for was syntax highlighting and I quickly found the CA65 extension which did exactly what I was after. The extension also provides build tasks but I have not used them as I decided to go with make. Overall, the combination of Vice, VS Code, ca65 and make ended up making quite a productive environment where I could quickly build, launch and debug my project.

To handle the NodeMCU part I decided to stick to Arduino Studio. I knew that VSCode had an Arduino extension (heck, I even created one long time ago before Microsoft decided to occupy this space) but it tried to reformat my code the way I did not like and I didn’t want to spend the time on adjusting it to my liking. I also think I had some issues with uploading my sketch to the board while everything worked fine from Arduino Studio.

At the beginning I was able to test my NodeMCU code using screen. It was possible because the protocol I implemented was text based. Later, I switched to a fully binary protocol and using any general purpose solution was not an option, so I created a simple terminal in Python that was able to interpret and translate my commands and the responses from the module.

I used a standalone NodeMCU module for most development but occasionally tested my code against the C-64 WiFi’s NodeMCU module. Surprisingly, I found some slight differences between how the boards behaved immediately after booting and had to implement a simple workaround which ignored first few bytes received from the module.

For the SignalR part I just took the chat server I created for my other project. I ran it locally during the implementation and then deployed to Microsoft Azure for final testing and demo.

The final missing piece of my environment was actual hardware. I had a Commodore 64 that I know was working the last time I turned it on because it was when I fixed it. I also had a 1084S-D2 monitor which stopped working when I was testing my C-64. Fortunately, it turned out to be only the power switch. Replacing the switch brought the monitor back to life. I decided to go fully retro and had to acquire a 1541 disk drive – luckily I found a working one in decent condition on craigslist. I received a bunch of disks used with Commodore 64 from a colleague many years ago. Despite all these years in a closet almost all of them worked just fine. The only thing remaining was to transfer the compiled program to a disk which I did using a SD2IEC module.

Looking back I am really amazed how many technologies – both hardware and software – were involved in putting my solution together. Four programming languages, vintage and modern hardware, embedded programing, Cloud technologies and a variety of, mostly open source, tools. All this made this project a lot of fun. Next time we will take a closer look at the implementation.

Cloud enabled Commodore 64: Part I – Introduction

This is the first post in a series that talks about my recent project dubbed “Cloud enabled Commodore 64”. The project is an attempt to connect Commodore 64 to Cloud (Azure) and let it communicate with a variety of clients – both modern and vintage. Here is a demo of the final result:

I had the idea of connecting Commodore 64 to Cloud in my head for a really long time. When I initially tried to take a stab at it, it was apparent that I didn’t have skills necessary to build the hardware. When the C64 WiFi modem came out I have already moved on and did not pay attention. Until that one, dark autumn Friday night, when I was browsing ebay and came across a C64 WiFi modem which I promptly bought. To be honest I did not even spend too much time looking at the pictures and when it arrived, I was very surprised to notice that the modem is just a NodeMCU Esp8266 board that can be plugged in to the C64 User port. This was a very pleasant surprise because I was already familiar with NodeMCU – I used it for one of the first ASP.Net Core SignalR demos.

The main purpose of the original C64 WiFi modem and its firmware was to allow Commodore 64 owners access BBS’es around the world with software called Nova Term. This did does not appeal to me at all. Due to the times and place I grew up in I did not even have access to a landline and the only way to get new software was via swapping with other enthusiast either at school or over mail. I did spend a night playing with the modem and figured one can use this modem to connect to a BBS directly from a Mac or Linux using screen (or a PC using Putty). This convinced me that the modem works and that my idea suddenly became real.

How? – High level design

The modem pretty much dictated the design. The communication between C64 and the modem would use Serial protocol and the modem would require a firmware that would deal with all network related affairs.

Cloud enabled Commodore 64 design

I decided on a few principles upfront:

  • Modem firmware will only deal with network (i.e. will not include client specific logic)
  • C64 software will be written in 6502 assembly
  • C64 software will use built-in Serial routines (KERNAL)
  • I will use Azure as the cloud provider and will use SignalR

I decided to use 6502 assembly to remember the fun I had using it on my first computer when I was a kid. Right decision or not, it made me appreciate how much progress have been made with regards to programming since then.

The KERNAL routines for Serial protocol are infamous for their bugs but they work OK at low speeds. There are several routines that patch and fix KERNAL code responsible for serial communication and allow reliable transfers at 2400 or even 9600 bauds. After I started investigating, I quickly realized that researching this subject would be interesting but also very time consuming. While it would be nice to have faster serial communication, running at 1200 bauds felt to be fast enough for this project – let’s be honest, in today’s world 9600 bauds is as fast (or as slow) as 1200 bauds and I never thought this project could have any practical usages.

Finally, I decided to go with Azure simply because I am much more familiar with Azure than AWS or Google Cloud. I am also quite familiar with SignalR and how it allows building engaging demos with the canonical example of a chat app being something that might even seem a legit use case for a 40-year-old computer.

These were my thoughts before I embarked on this project. I will however revisit some of these decision in a future post where I will reflect on surprises I encountered and what I could have done differently.

Why?

As noted before – this project was never supposed to have any practical usages. I just thought it would be a fun hobby project. And it really was. Seeing it working live on a real hardware was a blast.

That’s it for today. Next time I will go over the environment I used to develop this.