Disclaimer: SignalR Core is still in early stages and changing rapidly. All information in this post is subject to change.
To test some of the scenarios described in the first part of this mini-series I came up with an idea for a relatively simple application where users can report to the server the weather at their location and their report will be broadcast to all the connected clients. I called this application SocialWeather. The central part of the system is an ASP.Net Core application running SignalR Core server. The server can handle massages received in one of the following formats – JSON, Protobuf and pipe (the pipe format is a simple format I created where the data is separated by the pipe (|) and the message ends with the new line character (\n)). I also created 3 different clients – a JavaScript clients using the JSON format, a C# client using Protobuf and a lua client using the pipe format. The JavaScript client is part of a web page served by the same application that hosts the server. The C# client is a console application that that can send and receive Protobuf messages. The lua client is the most interesting as it runs on an ESP8266 development board with the NodeMCU firmware. The whole system is using the “socket” level of the new SignalR which is a kind of counterpart of persistent connection in the previous version of SignalR (so no hubs API here). All the clients use bare websockets to connect to the server (in other words there is no SignalR client involved).
The SocialWeather server, which includes the JavaScript client is a sample project in the SignalR repo and you can run it yourself – just clone the repo, run build.cmd/build.sh to install the correct version of the runtime and restore packages. Then go to the samples/SocialWeather folder and start the server with dotnet run.
The C# and lua clients are in my personal repo. Running the C# client is straightforward. After you clone the repo you need to restore packages update the URL to the SignalR server and run the client with dotnet run. Each time you press Enter the client will generate a random weather report and send it to the server. If you type “!q:” the client will exit.
The lua client is meant to run on an ESP8266 compatible board with NodeMCU firmware installed. Preparing the board to run the client requires a bit of work. The first step is to set up serial communication to the board. If the module you have is equipped with a USB port (I have the Lolin v3 board which does have a USB port) it should be enough to install a VCP (Virtual COM Port) drivers (you can find the drivers here http://www.ftdichip.com/FTDrivers.htm or here http://www.silabs.com/products/mcu/pages/usbtouartbridgevcpdrivers.aspx). If your board doesn’t have a USB port, you will need to use an additional module (e.g. Arduino) for USB-to-serial translation (you can find tutorials about setting it up on the web).
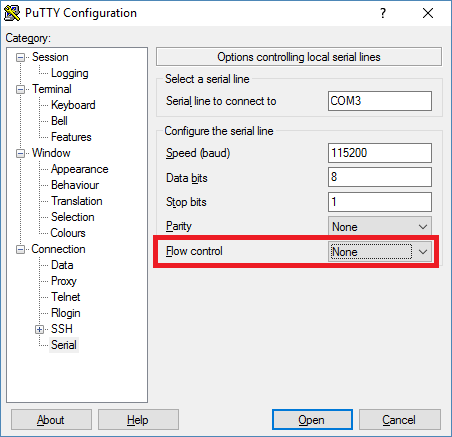
The next step is to make sure that your board has the right firmware. It needs to be a NodeMCU firmware with net, http, wifi, and websocket support. You can request a build here and follow steps in this tutorial to re-image your board. When the board is ready you should be able to connect to it using a serial terminal (I used screen on Mac and Putty on Windows). On Windows determine the COM port number the board is using using the Device Manager. On Mac it will be one of the /dev/tty* devices. The speed needs to be set to 115200. When using Putty make sure the Flow Control setting is set to None or the communication will not be working correctly.
Once on the device you need to connect it to your wireless network by sending the following commands (you need to replace SSID with the name of the network and PWD with the password or an empty string for open networks):
wifi.setmode(wifi.STATION)
wifi.sta.config(SSID, PWD)
wifi.sta.connect()
We are now ready to run the client. If you haven’t already, clone the repo containing the client go to src/lua-client folder and update the URL to the SocialWeather SignalR server. Now you can transfer the file to the device (if you are connected to the device with the terminal you need to disconnect). The nodemcu-uploader Python script does the job.
If all stars aligned correctly you should be able now to start the client by executing:
dofile(“social-weather.lua”)
it will print a confirmation message once it connected successfully to the server and then will print weather reports sent by other client. You can also send your own weather report just by typing:
ws:send(“72|2|0|98052\n”)
and pressing Enter.
The command may look a bit cryptic but is quite simple. The ws is a handle to the websocket instance created by the social-weather.lua script. send is a method of the websocket class so we literally invoke the send method of websocket interactively. The argument is a SocialWeather report in the pipe format: a pipe separated list of values – temperature, weather, time, zipe code – terminated with \n.
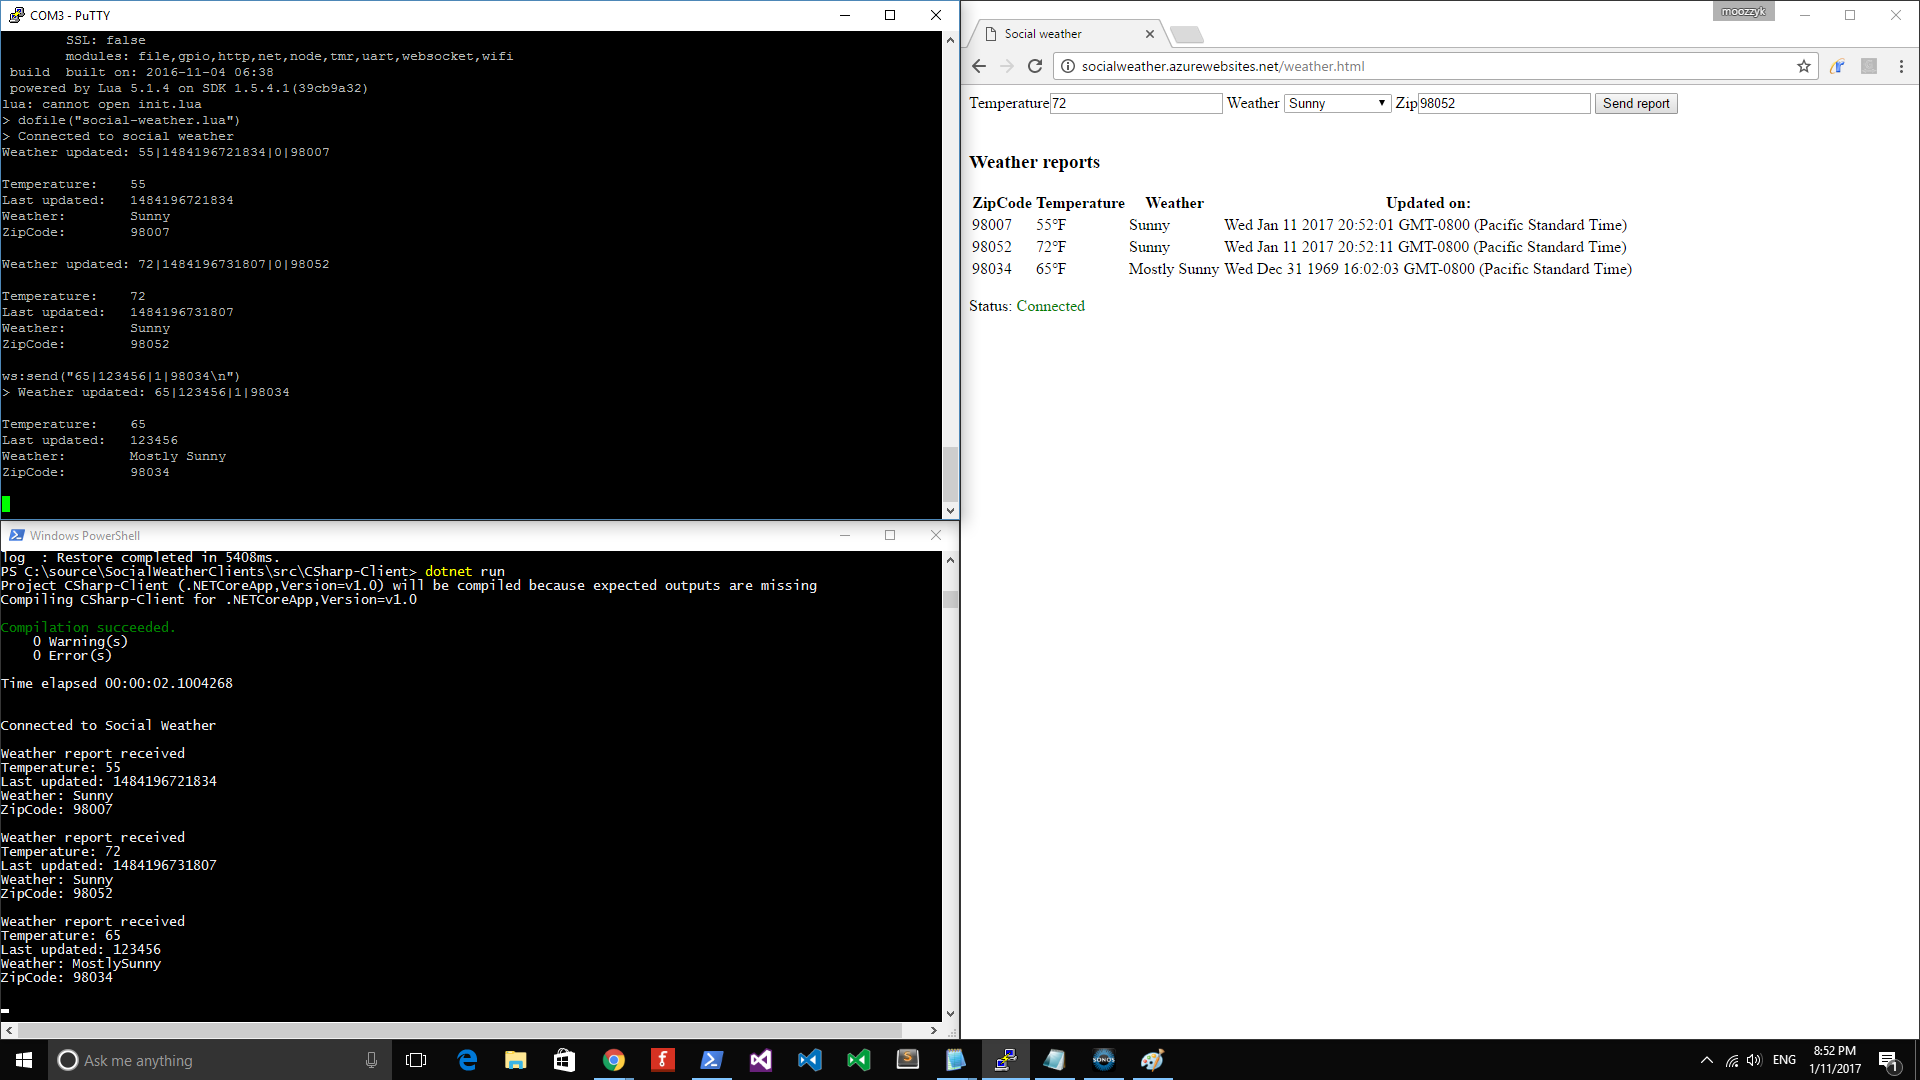
This is what it looks like when you run all three clients:
Let’s take a look at how things work under the hood. On the server side the central part is the SocialEndPoint class which handles the clients and processes their requests. If you look at the loop that processes requests it does not do any parsing on its own. Instead it offloads parsing to a formatter and deals with strongly typed instances. Formatter is a class that knows how to turn a message into an object of a given type and vice versa. In case of the SocialWeather application the only kind of messages sent to and from the server are weather reports so this is the only type formatters need to understand.
When sending messages to clients the process is reversed. The server gives the formatter a strongly typed object and leaves it to formatter to turn it into a valid wire format.
How does the server know which formatter to use for a given connection? All available formatters need to be registered in the DI container as well as mapped to a type they can handle and format. When establishing the connection, the client sends the format type it understands as a query string parameter. The server stores this value in the connection metadata and uses later to resolve the correct formatter for the connection.
On the client side things are even simpler. The lua client has just 30 lines of code half of which is concerned with printing weather reports in a human readable form. Because the format of the connection cannot change once the connection is established message parsing can be hardcoded. The rest is just setting up the websocket to connect to the server and react to incoming message notifications.
The C# client is equally simple. It contains two asynchronous loops – one for receiving messages (weather reports) from the server and one for sending messages to the server. Again, handling the wire format (which in this case is Protobuf) is hardcoded in the client.
This is pretty much all I have on ASP.Net Core Sockets. With a simple application we were able to validate that the new version of SignalR can handle many scenarios the old one couldn’t. We were able to connect to the server from different platforms/environments without using a dedicated SignalR client. The server was capable of handling clients that use different and custom message formats – including a binary format (Protobuf). Finally, all this could be achieved with a small amount of relatively simple code.


