By now many people saw the demo of the Cloud Enabled Commodore 64 project, read posts discussing implementation and the retrospective and some commented that they would like to try it out themselves. This post describes how to do that.
We will start from listing required hardware and then will move to the required software.
Hardware
There are two hardware options to try the project out – you can either use an emulator or use a real Commodore 64. The emulator route is a bit easier as it does not require a working Commodore 64 and additional peripherals. You will still need a Node MCU board like this:
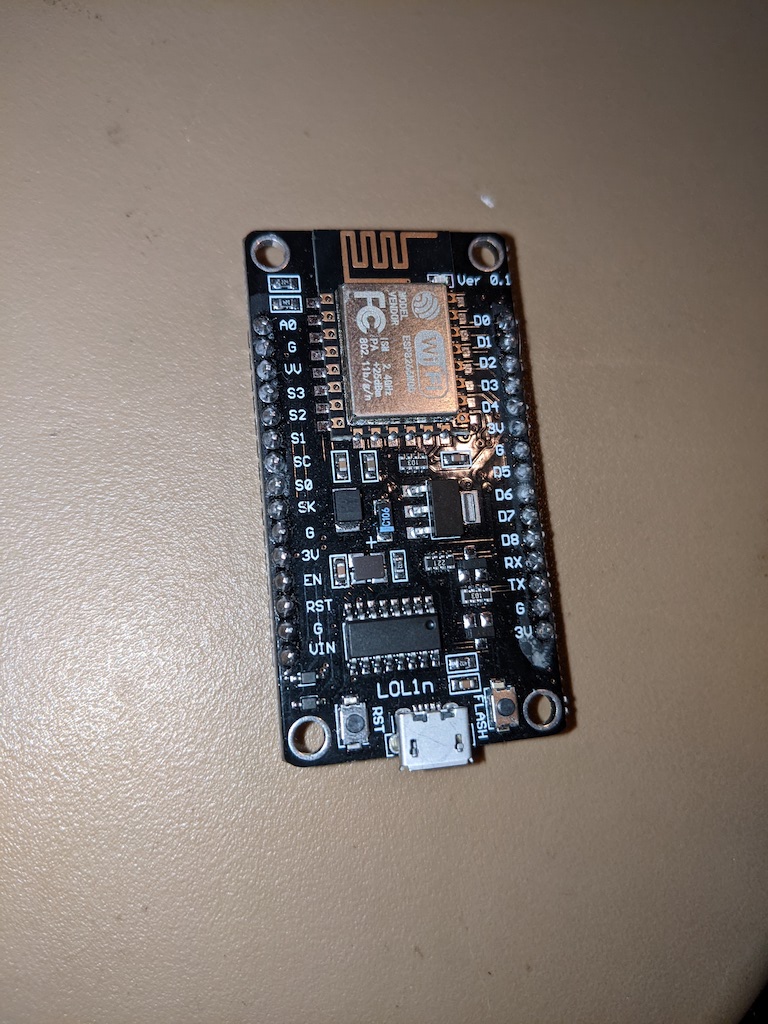
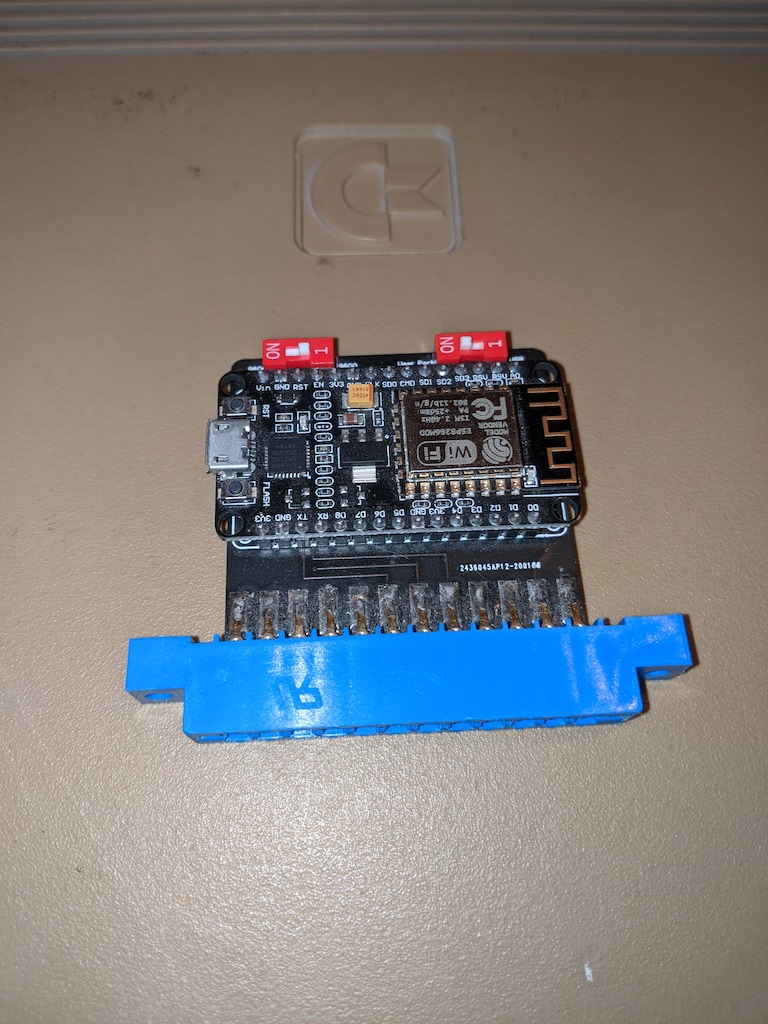
which you can get on ebay for below $5. If you decide to try it out on a real Commodore 64 you will need a C64 WiFi modem. Make sure it is using the NodeMCU module and that the module is accessible. This is how mine looks like:
For the real C-64, you will also need to be able to load the cross-compiled program to your C-64. There are a few possibilities here – I used an SD2IEC floppy drive emulator, and it worked great for my needs.
Software
Before moving to software I would like to start with a disclaimer. I did all the work on MacOS. I will try my best to provide instructions for Windows and Linux, but they might be lacking.
Git
You will need git to clone the project repo. It is very likely that you already have git installed on your machine but if not follow instructions from here: https://git-scm.com/book/en/v2/Getting-Started-Installing-Git
make
You will need make to build the project and the cc65 toolchain. On MacOS you can get it by installing Apple developer tools. On Linux, you likely already have it. On Windows you would need to install either Cygwin or use WSL (Windows Subsystem for Linux).
cc65
cc65 link is a “cross development package for 6502 systems”. To get it, follow instructions listed on https://cc65.github.io/getting-started.html. Please make sure the tools can be resolved (e.g. run sudo make avail or add them to the path). You can test your installation by running cc65 from command line and verifying that it printed cc65: No input files.
Arduino IDE
We will need to update the NodeMCU board for which we will use the Arduino IDE. It can be downloaded from https://www.arduino.cc/en/software.
VICE emulator
If you are going the emulator route (which I recommend even if you eventually want to use the real C-64) you will need the VICE emulator which you can download from: https://vice-emu.sourceforge.io/index.html#download
Dotnet
You will also need the .NET SDK. It will be used to run the server locally. This makes it easier to test and troubleshoot, if necessary. It is will also be needed if you decide to publish the server to Azure. You can get the .NET SDK from https://dotnet.microsoft.com/en-us/download
Node and npm
The server contains a web client which depends on a few node packages (most notably the @microsoft/signalr package) so you will need npm to install these packages.
Preparing and running the application
With all pre-requisites installed we can get down to business and try to start the application. Here are the steps:
- Clone the project repo
Rungit clone https://github.com/moozzyk/SignalR-C64 - Start the TestServer
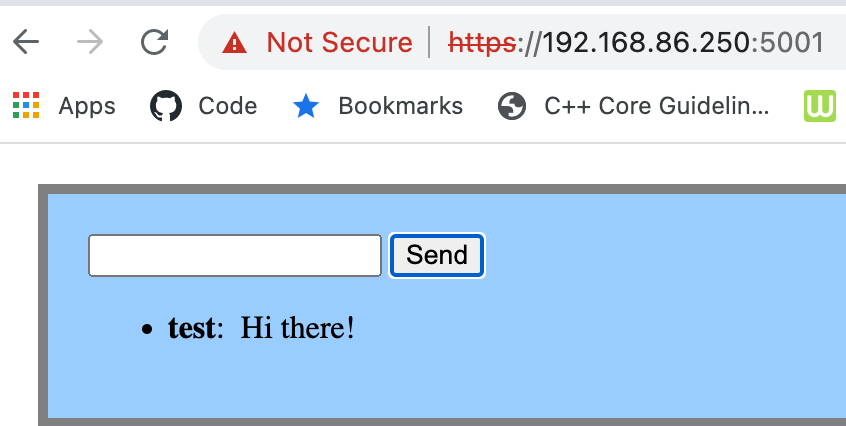
The test server is the chat server our chat application will be talking to. Note, that the server registers an https endpoint which on will use a developer TLS certificate when running locally. This may result in showing a warning or asking to register the certificate (which you can do by executingdotnet dev-certs https --trust). If you don’t want to see the warning you can remove thehttpsurl from this line and just use HTTP. This will work fine for local runs but is not recommended (perhaps not event possible) when running the server on Azure. You will also want to make sure that the server is accessible from outside of your machine (i.e. make sure that other devices on your network can access the application).
To start the TestServer you need to go (cd) to the TestServer directory and run:npm installdotnet run - Verify that the test server works
Connect to the server using a browser. Ideally you would want to connect using an external IP or the name of your machine (i.e. avoid127.0.0.1orlocalhost) or use another device connected to the same network. Once connected try to send a message – if you receive the message you typed, the server is set up correctly. (Note that if you try connecting to the server with HTTPS you may see warnings caused by using the local (dev) TLS certificate.)
- Backup the C64 WiFi Modem firmware (optional)
If you are using the C64 WiFi Modem for this project you may want to back the currently installed firmware up as the next step will overwrite the firmware effectively removing the original functionality provided with the modem (i.e. connect to BBSes). One way to do this is to use the esptool to download the existing firmware and then upload it later to bring back the original functionality. You can install the esptool by running:pip install esptool
To download the firmware connect the modem to your computer and run (remember to update theportto point to your serial device):esptool.py --baud 115200 --port /dev/cu.usbserial-1420 read_flash 0x0 0x400000 ~/tmp/C64WiFi-backup-4M.bin
To upload the firmware back to the board run:esptool.py --baud 115200 --port /dev/cu.usbserial-1420 write_flash 0x00000 ~/tmp/C64WiFi-backup-4M.bin
You can usescreen(or Putty on Windows) to test that the firmware has been uploaded correctly. First run:screen screen /dev/cu.usbserial-1420 300
and then typeAT?You should see something like this:AT?cOMMODORE4EVER V2.3 wIFI mODEM...
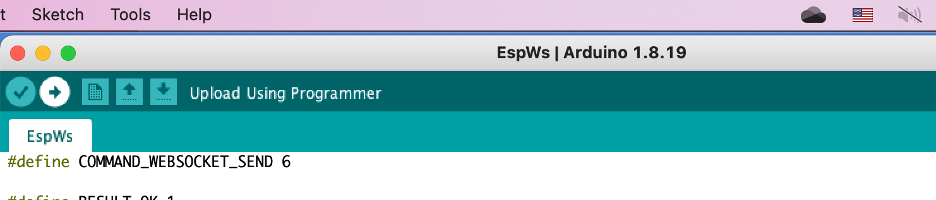
- Upload the firmware to the NodeMCU board
– Start Arduino IDE and open the EspWs.ino sketch and set the default credentials on this line. (For simplicity, the code running on C-64 does not allow setting credentials – it assumes that the credentials are properly configured and will just initiate WiFi connection.)
– If you are planing to use real C-64 set the transfer speed to 600 bauds here. Leave 1200 if using the emulator as Vice-64 does not seem to support 600 bauds.
– Connect your NodeMCU board (or the C64 WiFi Modem) to your computer.
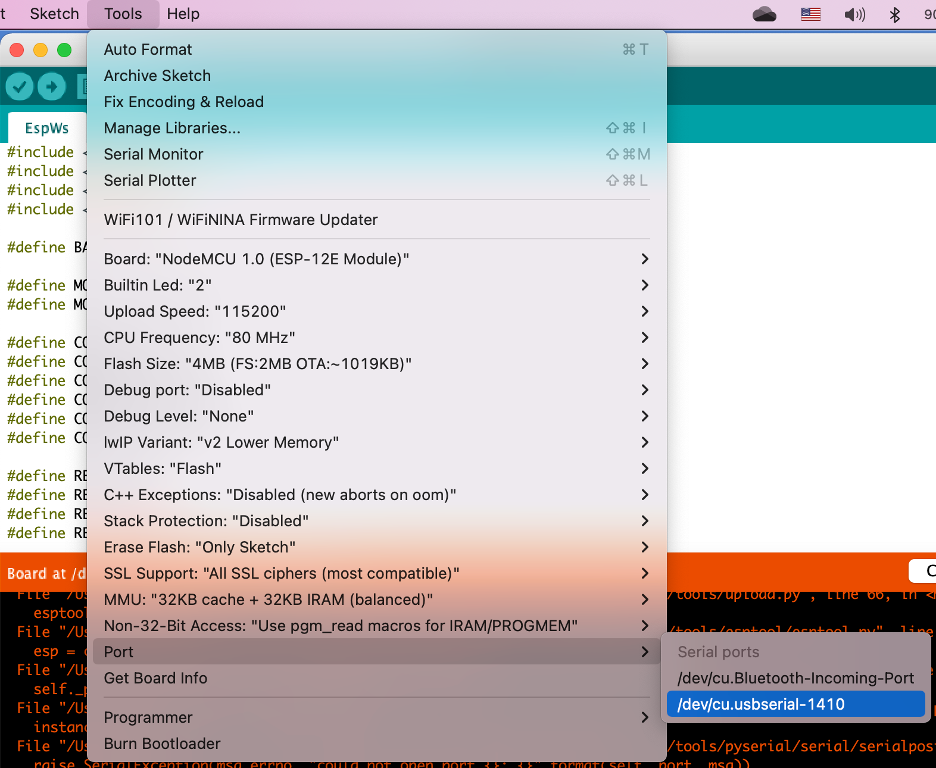
– Make sure to select the NodeMCU 1.0 (ESP-12E Module) board (If you can’t see this board you may need to add it first using the Board Manager Tools -> Board Manager, search for “esp8266” and then install)

– Select the device
– Upload the firmware to the board
- Verify firmware was deployed successfully
Go to the EspWs directory and run the following command (make sure to provide correct values for the server, device and transfer rate):python3 prototype.py 192.168.86.250:5000 /dev/cu.usbserial-1420 1200
If the firmware has been uploaded correctly you should see the following output:b'\x03\x00'
OK
b'\x05\x1dws://192.168.86.250:5000/chat'
WS
b'Connected'
b'\x06*{"protocol": "messagepack", "version": 1}\x1e'
OK
DATA
b'{}\x1e'
DATA
b'\x02\x91\x06'
DATA
b'\x02\x91\x06'
Note there will be some delay before you will be able to see most of the output as it takes about 10 seconds for the board to connect to WiFi. Another, important thing is that if you stop the script and want to try again, you’ll need to reset the board (press the RST button on the NodeMCU module and wait a few seconds before trying again).
- Configure Vice
This step is only needed if you want to run the app using the Vice emulator.
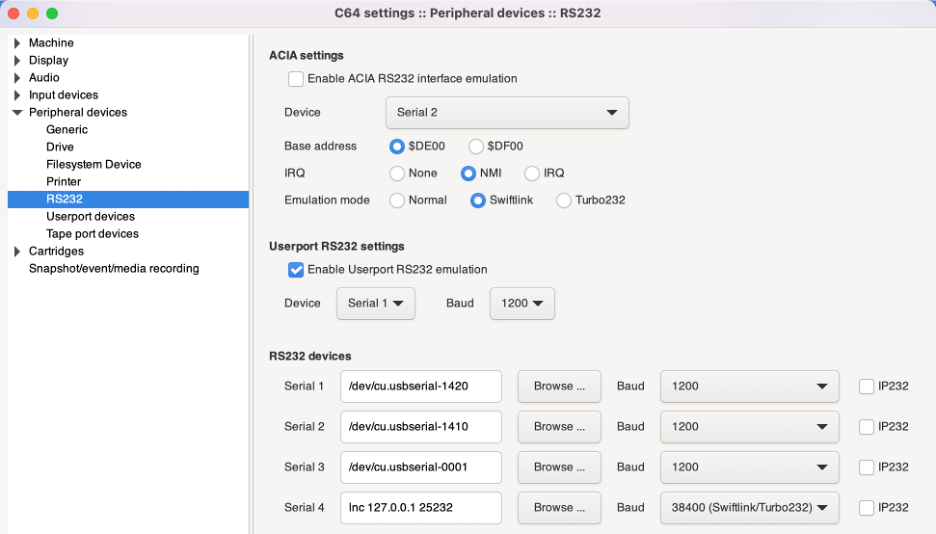
Open Vice and go toSettings -> Peripheral devices -> RS232
Make sure to “Enable Userport RS232 Emulation” and select the device that you want to use. In the RS232 devices you need to provide the device filename and the transfer speed. For the emulator you want to 1200 bauds. Here is how this is configured in my case:
- Configure chat server URL
You will need to set the correct URL to be able to connect to your chat server by modifying the value here. - Build and run
The application should now be ready to run. Go to theAppdirectory where you will be able to build the application withmake. The makefile supports a few targets. The default target (i.e. runningmakewithout any arguments) will compile the app to a.prgfile.make cleanwill delete temporary files.make d64creates a .d64 (disk image) file you can either to attach to the emulator or use to run on a real C-64 (e.g. using SD2IEC). The fastest way to build and run the app on the emulator is to invoke the following command:make clean && make && x64sc --autoload signalrdemo.prg
It will clean temporary files, create a prg file, start the emulator and automatically load the prg. Then you can just typerunin the emulator to run the app. - Deploy the server to Azure (or a cloud provider of your choice)
If the application is working correctly in the local environment you can deploy the server to a cloud provider. You will need to update the URL accordingly and compile with the new settings (steps 8 and 9).
This post concludes the Cloud Enabled Commodore-64 mini series. I hope this project brought back some good memories for you as it did for me.
